Monday 19 April 2010

Cheese and Thyme Muffins

Savoury muffins which are a firm fav with my kids, lovely cut in half and spread with either butter or cream cheese.


Ingredients:

2oz (55g) butter
7oz (200g) plain flour
2tsp baking powder
2tbsp sugar
1/4 tsp salt
1 tsp paprika
2 eggs
4floz (125ml) milk
1tsp thyme (optional)
2 oz (55g) mature Cheddar cheese, cut into 1cm cubes

Method:

Preheat the oven the oven to 375oF/190oC/Gas 5. Grease Muffin tins or position paper cases.
Melt the butter and set aside
In a mixing bowl sift together the flour, baking powder, sugar, salt, and paprika
In another bowl combine the eggs, milk, melted butter and thyme. Whisk to blend.
Add the milk muxture to the dry ingredients and stir just until moistened; do not mix smooth.
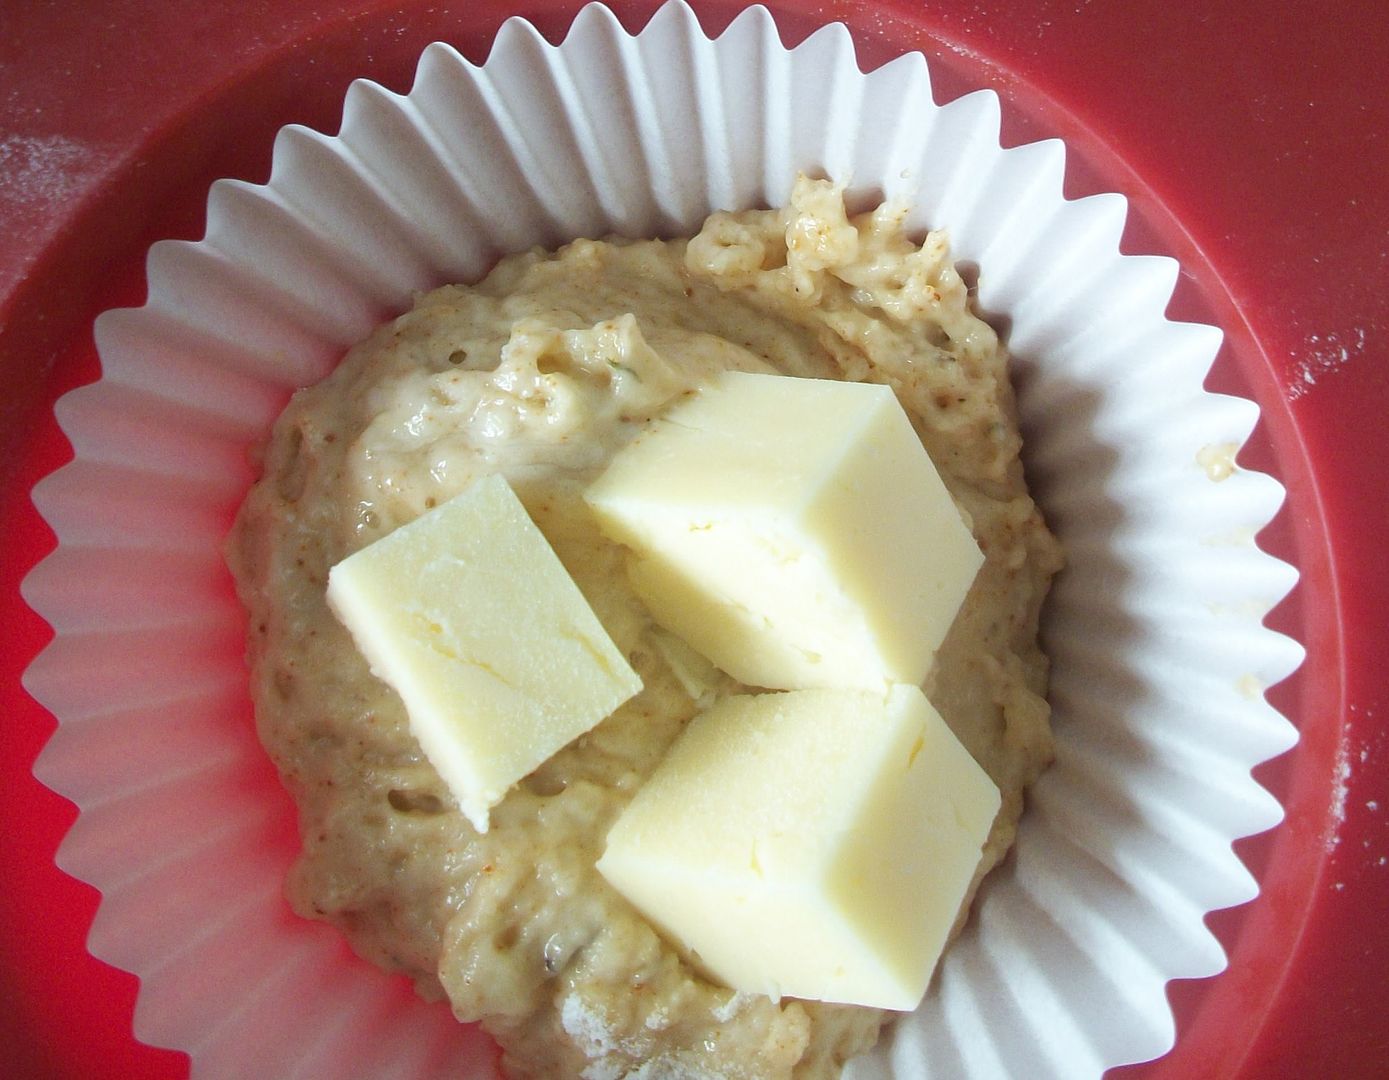
Place a heaped spoonful of batter into the prepared cups. Drop a fewpieces of cheese over each (see diagram above), then top with another spoonful of batter. For even baking, half-fill any empty muffin cups with water.
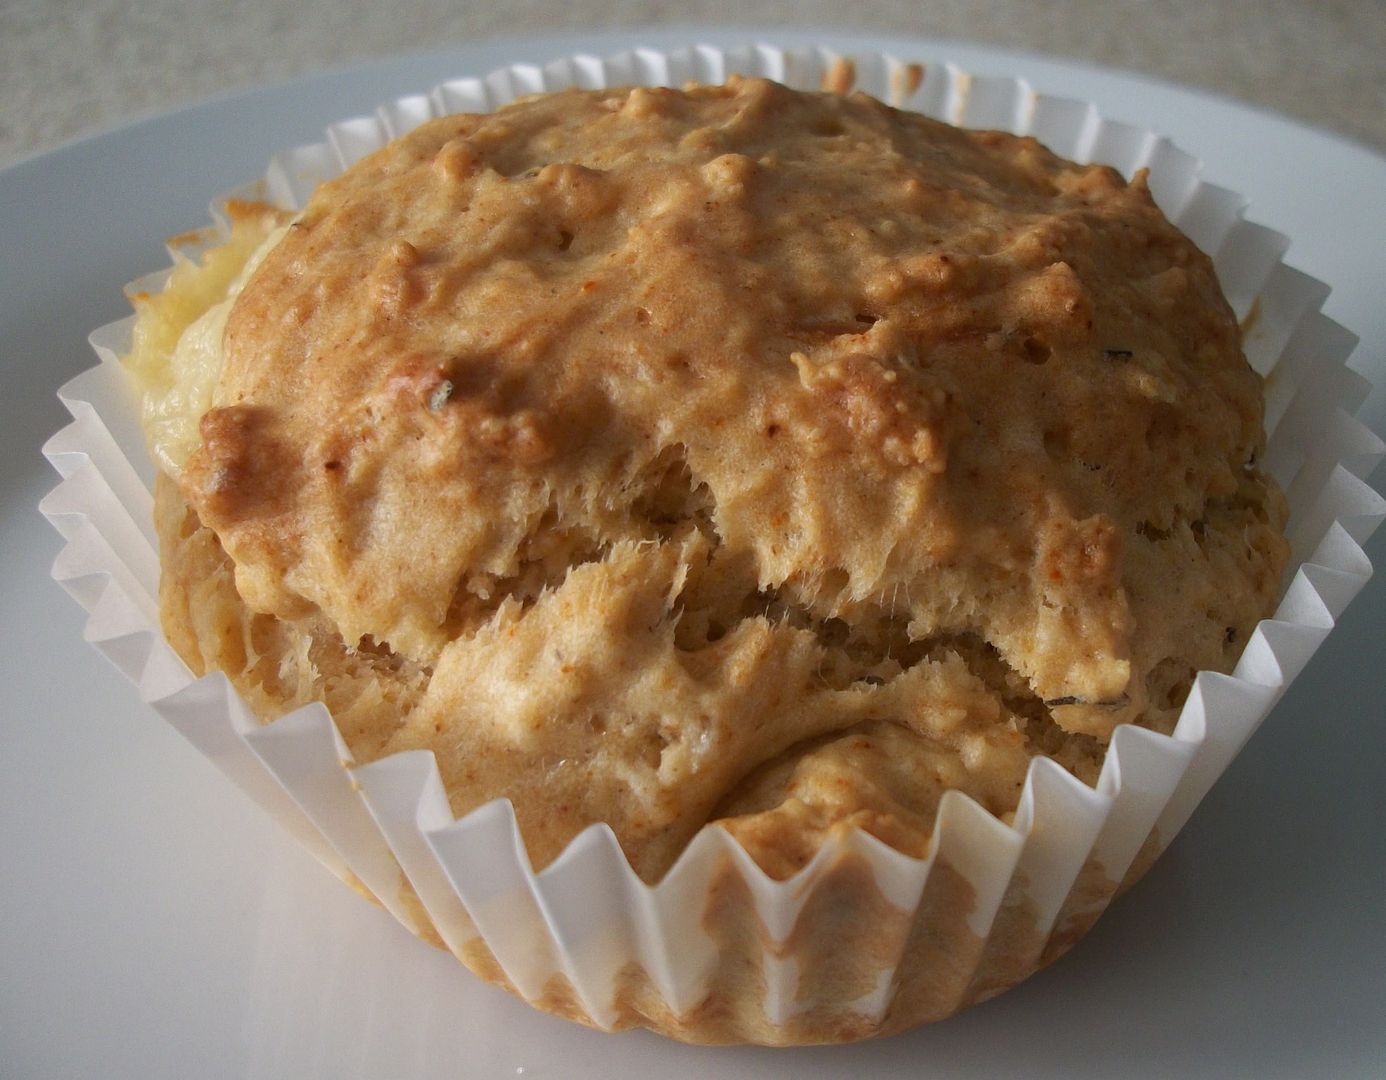
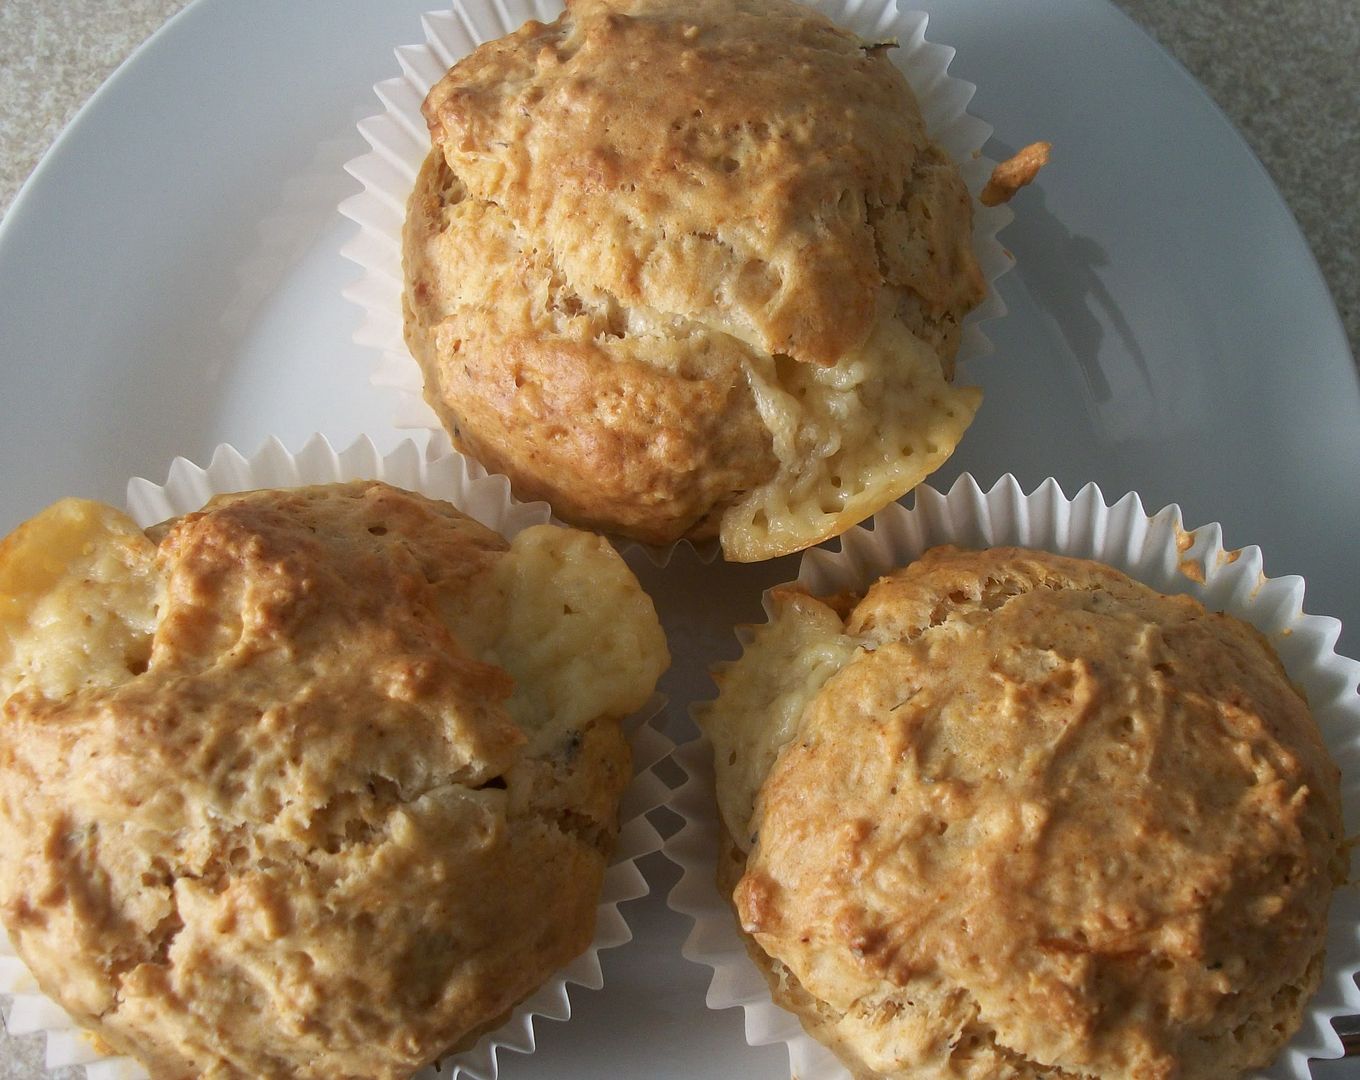
Bake until puffed and golden (about 25mins). Let stand for 5 mins before unmoulding on to a rack. Serve warm or at room temperature

Saturday 17 April 2010


I am unfortunately experiencing difficulties with my internet connection (i.e I have non at the moment) & therefore problems posting, hopefully normality shall return shortly, please bear with me.

Friday 16 April 2010

Boys Necklaces

I was walking with Kai to pay for the new pair of sunglasses he'd chosen from Primark when I spotted these mens necklaces. I found them rather plain but envisaged I could use the beads mixed together to make a patterned necklace, and maybe stop Kai raiding mine!
I snipped each thread right by the knot so I could use the elastic in them again.
With adding a few of my own beads this is what I came up with.....
2 necklaces for both of my lads, with loads of beads left over

Here's Zack with his, I used the brown and cream beads, and added 2 larger beads to put either side of the surfboard charm I had.

& heres Kai with his. I used the black and cream beads, adding my own red beads. I need to get more elastic to make this one larger as though it fits perfectly at the moment Kai grows very quickly and I dont want gaps in the necklace. The elastic in the necklace is extremely stretchy, stretching to almost 3 times the size of the necklace so I have no worries with Kai wearing it.

I also had the biggest compliment I could get from my OH, he's asked me to make him a couple of bracelets like them.

Wednesday 14 April 2010

Glass Tile Pendants

Yes, its another piece of jewellery I want to have a go at!

Helen over on "It's All Fiddle Fart" has opened my eyes up to glass Tile Pendants. Heres her first try with them...

Amazing arent they, so elegant and FAB!!! She has kindly done a tutorial here for them as well.
Helen also suggests googling "glass tile pendants" to find out more, so I did, and heres some of the items I found...


They seem so simple to do but so beautiful.

Tuesday 13 April 2010

Cooking to a timetable

When I'm cooking a large, special meal, such as Christmas or Easter I tend to get a lil OTT with planning. I dont like leaving anything to chance so start by writing in rough all that I'll be cooking and what timescale each takes. This then leads onto a timeline of jobs to do through out the morning so that each item should be cooked at the right time


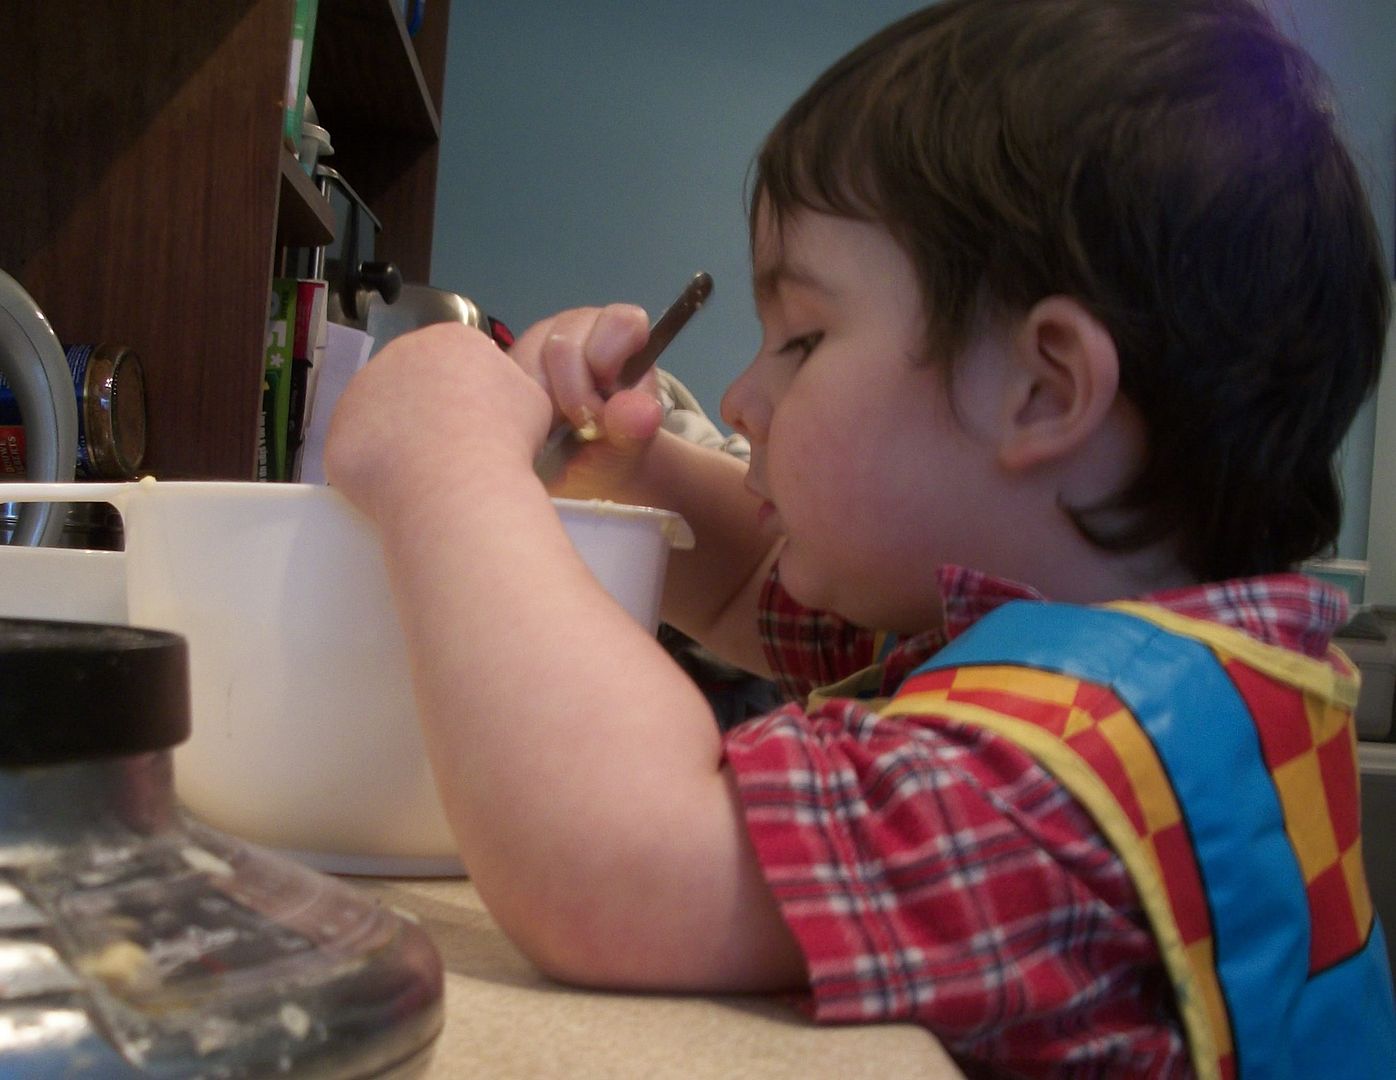
I then set alarms to remind me (you know what its like when you get into crafting or something ;)
At the moment I am using my iphone as I can set several alarms with notes with each but before that I would set an alarm clock and alter the time for the alarm to go off each time it rang.
I keep the sheet with the timeline on and if something isnt cooked right I make a note on it, such as if the roast carrots arent soft enough I make a note to either make them smaller, or par boil them for longer. This is then used in reference the next time I make a similar roast.

Its a constant process of improvement

And heres what this list led to, our Easter Roast :)

Monday 12 April 2010

Dorset Apple Cake

Kai had been ill recently with a very bad cough/cold that left him feeling rather rough, weepy and clingy. To cheer him up I said we'd make a cake, well no, I actually said biscuits thinking he'd enjoy using the biscuit cutters, but he decided he'd prefer to do a cake.

We decided on a Dorset Apple Cake, with its chunks of apple and fresh lemon taste.

Ingredients
225g butter, softened, plus extra for greasing
450g Bramley apples
Finely grated zest and juice of 1 lemon
225g caster sugar, plus extra for dredging
3 large eggs
225g self-raising flour
2 tsp baking powder
25g ground almonds
1 tbsp demerara sugar


1. Preheat the oven to 180°C/fan160°C/gas 4. Grease a deep 23-24cm springform cake tin and line with baking paper. Peel, core and cut the apples into 1cm pieces, and toss with the lemon juice.

2. Using an electric hand whisk, cream together the butter, caster sugar and lemon zest in a bowl until pale and fluffy. Beat in the eggs, 1 at a time, adding a little flour with each addition to keep the mixture smooth.

3. Sift the remaining flour and the baking powder into the bowl and fold in with the ground almonds. Drain the apple pieces well, then stir into the mixture.

4. Spoon into the prepared cake tin, lightly level the top and sprinkle with the demerara sugar. Bake in the oven for 1 hour or until well-risen, brown and a skewer inserted into the centre of the cake comes out clean. If the cake starts to look a little too brown, cover with a sheet of baking paper after about 45 minutes.

5. Leave to cool in the tin for 10 minutes. Remove the cake from the tin and place on a serving plate. Dredge heavily with the extra caster sugar. Cut the cake into generous wedges and serve warm with a spoonful of clotted cream, or custard.
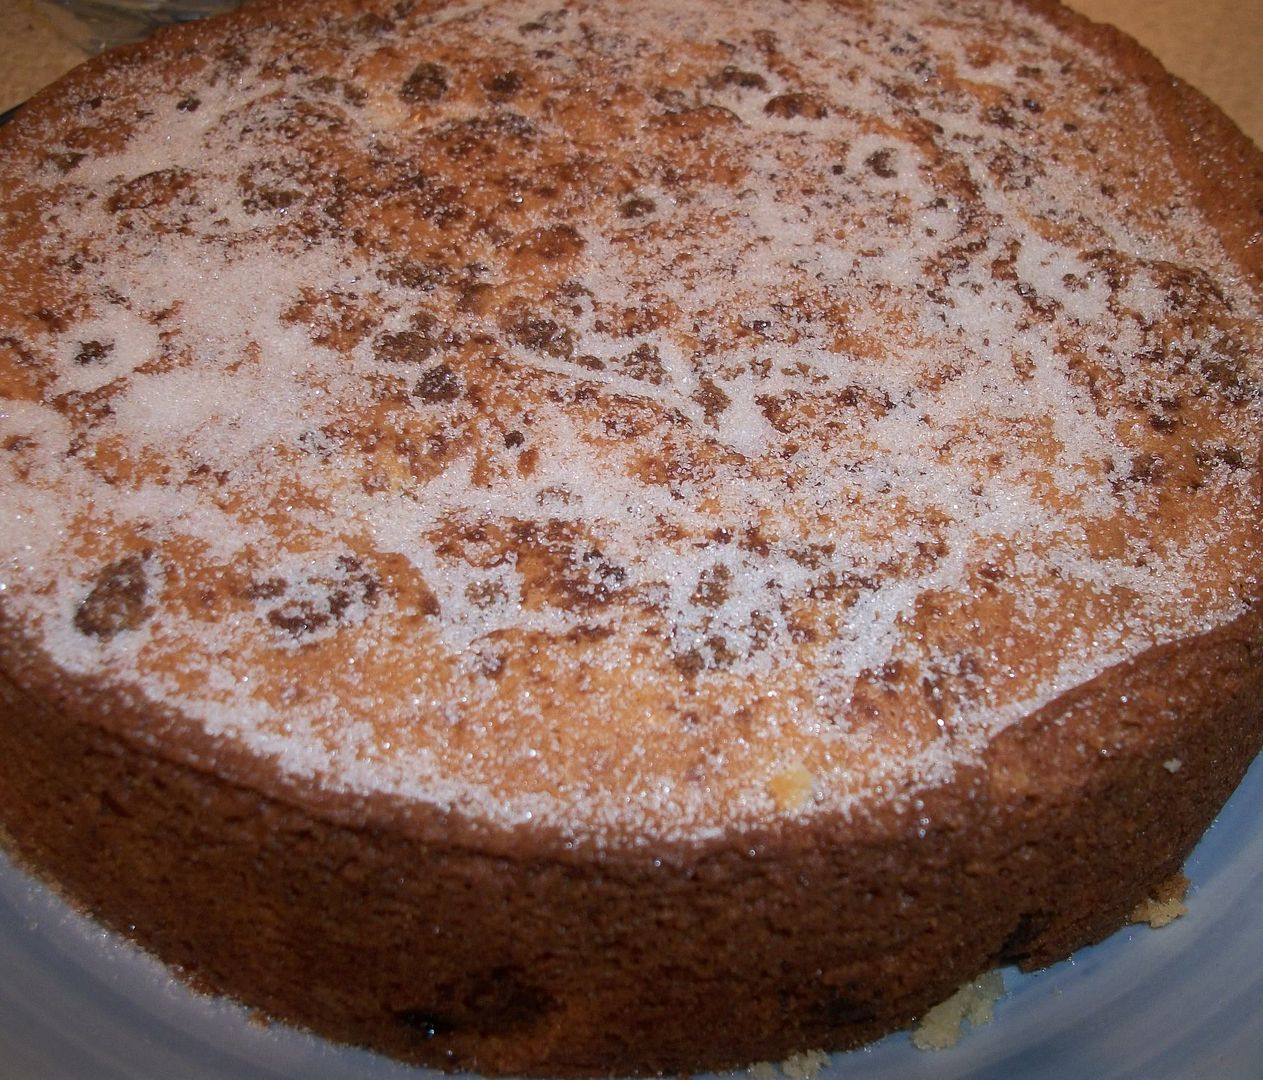
Its the first time we'd tried it, and when it had custard poured over it the cake tasted strangely gingerish! We definately hadnt added any theres no spices involved. Its not the prettiest of cakes but definately nice.

Always remember to clean the bowl

Using your fingers really helps with this at the end

Saturday 10 April 2010

So Small

Having just done a scrapbook page on Kai's birth, and looking through all the old baby photos it struck me how small he was when he was born (I was quite relieved I hadnt gone full term though), and how big he is now; I dont mean the normal "hes such a big boy now he's 3", I mean the "he's only just 3 but has been in size 4-5 year clothing since before Christmas". So I decided to do a scrap page on his one time smallness.


I knew I wanted multiple photos, I'd also decided that I wanted to have them in black and white. I came up with a grid layout that used patterned paper squares as the grid, and photos or stickers on top of these. Having cut the squares and laid them out on the pale yellow bazzil I'd chosen, along with the pictures I decided it looked ..... a bit bare ... a tad flat... just not right. I came up with sewing the squares on free hand, mainly with a zigzag stitch, but the odd square with cross stitch just to give it a different look and texture. I tried to stick with pale yellows and blues through out with a little bit of other colours to give interest.

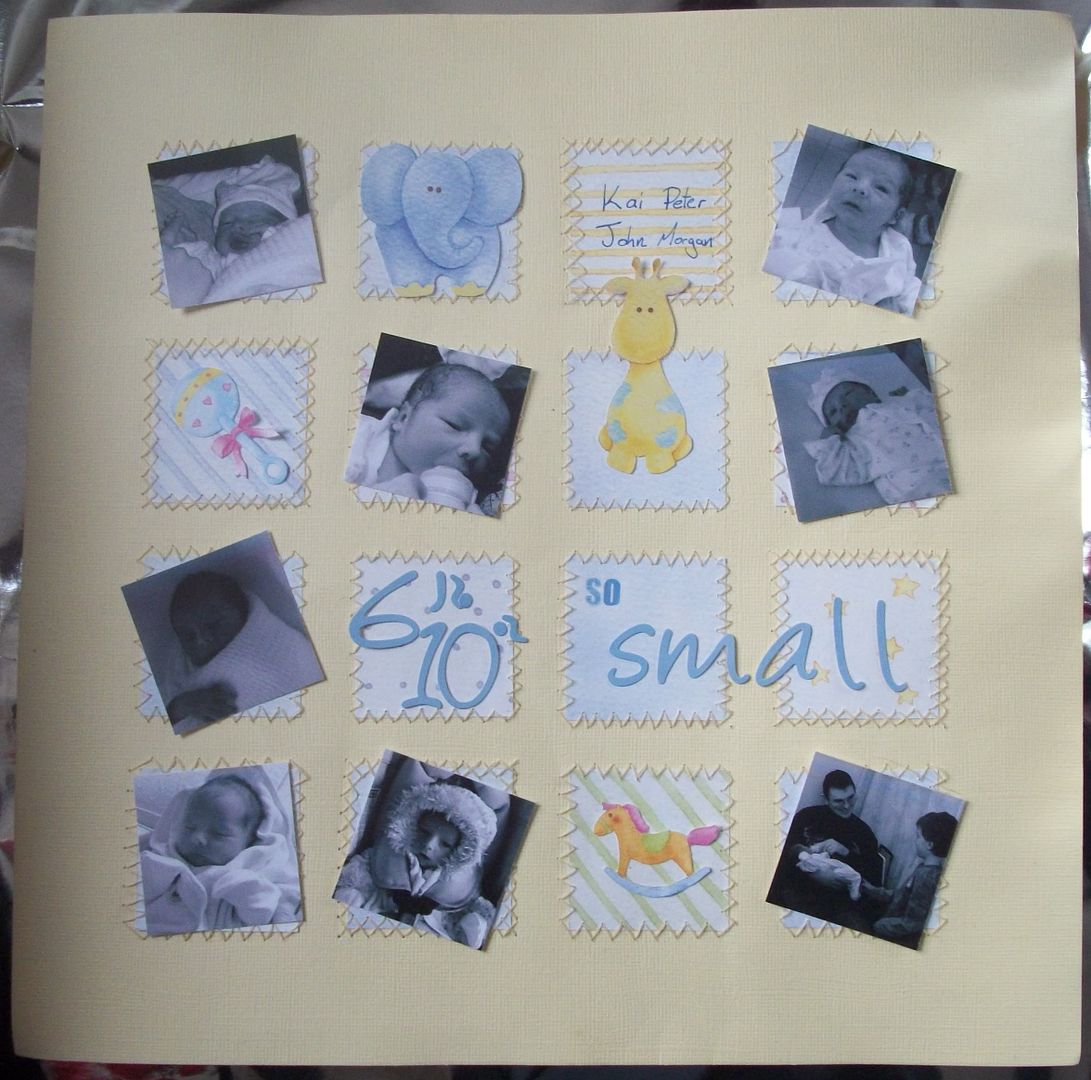
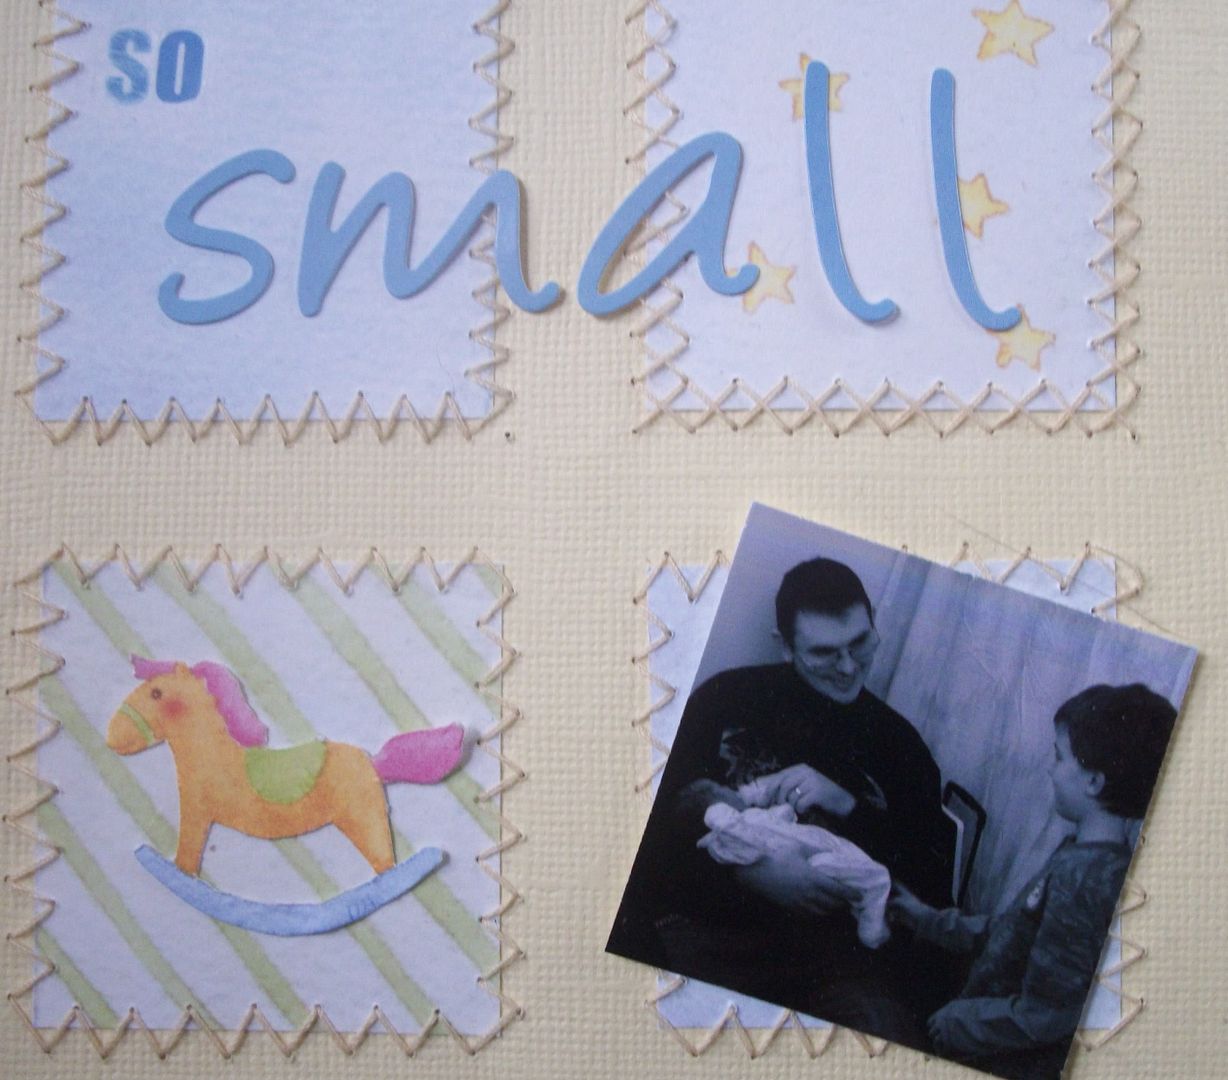
I didnt feel any journalling was needed except for his name, weight and title (though I do need to put his date of birth in somewhere)


I didnt have any little l b o or z's same used punctiation marks that came with the other letters.

Doing this has given me other ideas that I want to scrap, such as where the childrens names came from.

Friday 9 April 2010

Sweet boxes

Every year we have problems trying to decide what to get our nephews so this year we decided upon letting them buy their own. We also thought it would be disappointing if they didnt have anything to open from us on Christmas Day so agree'd we should put the money with some sweets.

I found some little tool boxes, the sort you could keep screws in with little screw drivers or such like, and decided this was perfect for putting sweets in.

Thursday 8 April 2010

Bottle Hanger

The lovely Rusty kindly shared with me the template she used to make her bottle hanger.
I used it to add to a bottle of red wine we'd got my SIL for her birthday so we could put a little bit of money with it to treat herself to something to go with it such as a chinese.

I made it to go the opposite way to Rustys so you couldnt see the money, and decorated the front with flowers and a "birthday wishes" sticker.

Wednesday 7 April 2010

Washer Jewellery

I think I've got a thing about recycling things to make other things at the moment, especially jewellery. SO heres my latest find...

Washer charms, arent these beautiful!
Multiple charms.

or singular

Think there may be a few tools on my birthday list, though can see me having to buy them myself, cant see my OH searching ebay for letter stamps, hammer, blow torch etc for me, he'd probably be scared what I'd do with them ;)

Tuesday 6 April 2010

Starting out using beads

Starting out with any new craft can be expensive, especially when you dont know if your going to be any good at it or even enjoy it, so I always look out for cheap alternatives. Buying beads is one of those crafts that can get very expensive, depending on what beads etc you buy, so to start off I have been looking out for cheap beads. The other day in poundland I found some very long necklaces. I checked that the beads werent attched to the wire thread, merely threaded onto it. They were so I grabbed 3 to have a play with.

The quality of most of the beads definately arent upto that of glass beads, and they feel different as well, lighter and not as cold. Some of them (such as the blue) are wooden and are very nice quality. They will give me something to play with, to create new designs and get a feeling for jewellery making. If I dont end up enjoying it I havent lost much money on it, and I can always use them in other projects.

So tuesdays tip is, keep you eyes open in other shops for cheaper alternatives when your just getting started.

Monday 5 April 2010

Classical Train Cake

Last Tuesday it was Kai's 3rd birthday, it took me a while to decide on whether to make him a train cake or get a Mario cake like Zack had for his 11th birthday. I decided to go for the train cake as he'd probably still be into Mario in the future.


I made up some chocolate butter icing, and bought a long chocolate swiss rolls, and a short one.

The longest I used as the engine train, and the smaller one as a carriage.

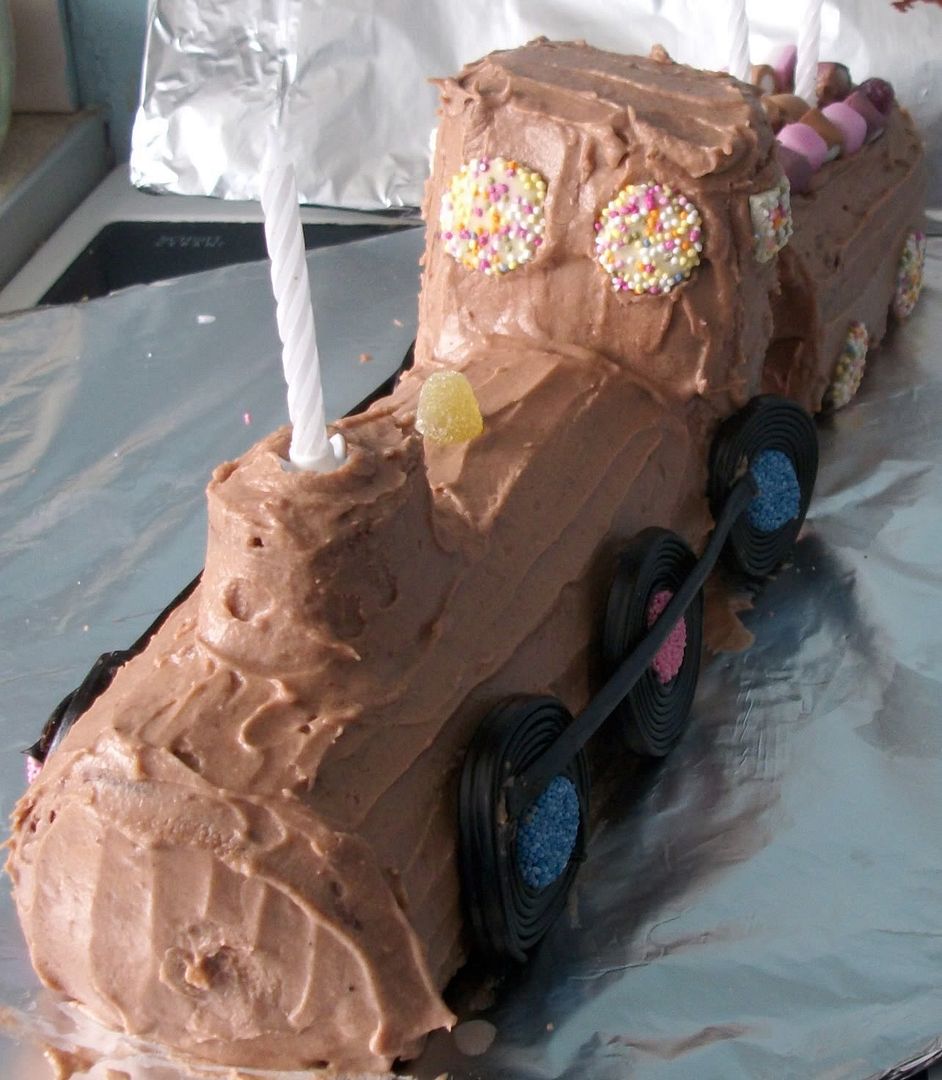
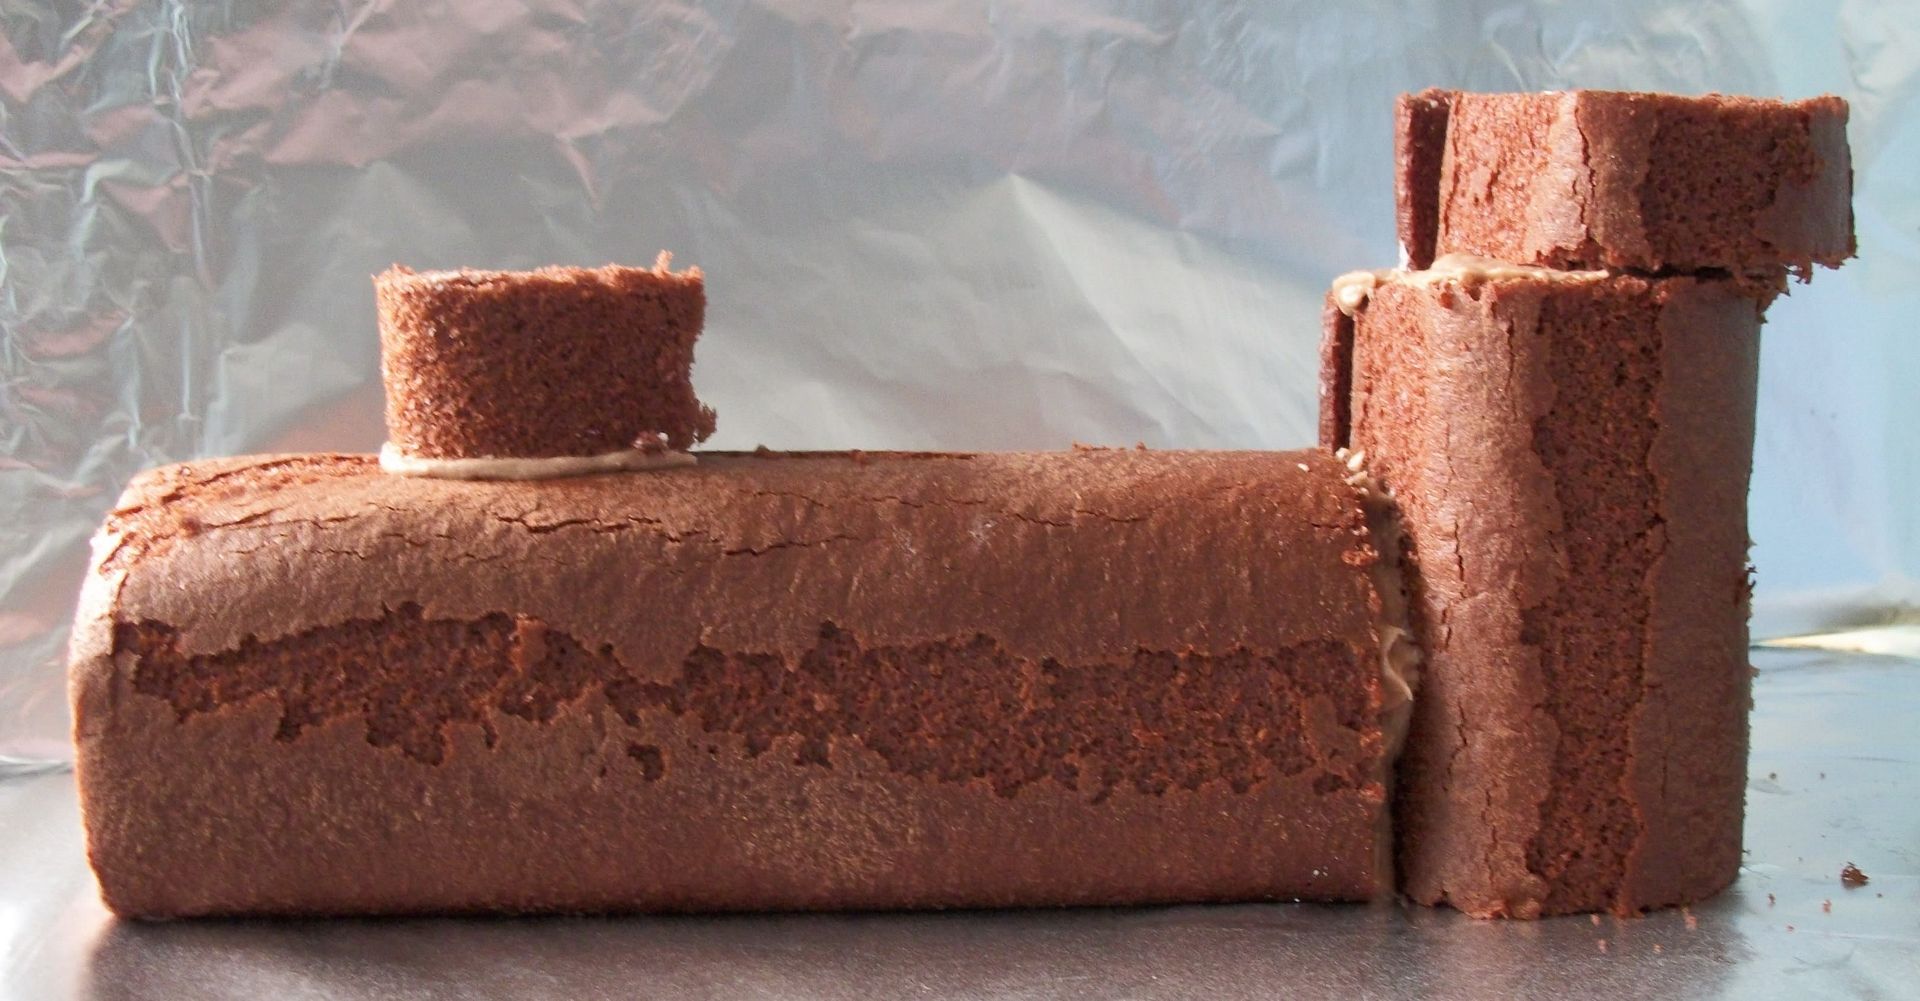
I used the butter icing to stick the pieces together.
And then to cover the whole thing, which was much trickier than I thought it would be.

I finished off by adding the candles, rainbow milk buttons (carriage wheels and windows), dolly mix (cargo) and liqurice wheels (train wheels)


All lite up


A swirly slice

Sunday 4 April 2010

Red shoes, black lace and markers pens, ooo what fun!

I wanted a flat pair of pumps for the NEC, perfect for lots of shopping without aching feet, and had already planned that I was likely to alter them. Having a look round Primark I spotted a red pair of slip ons for £8


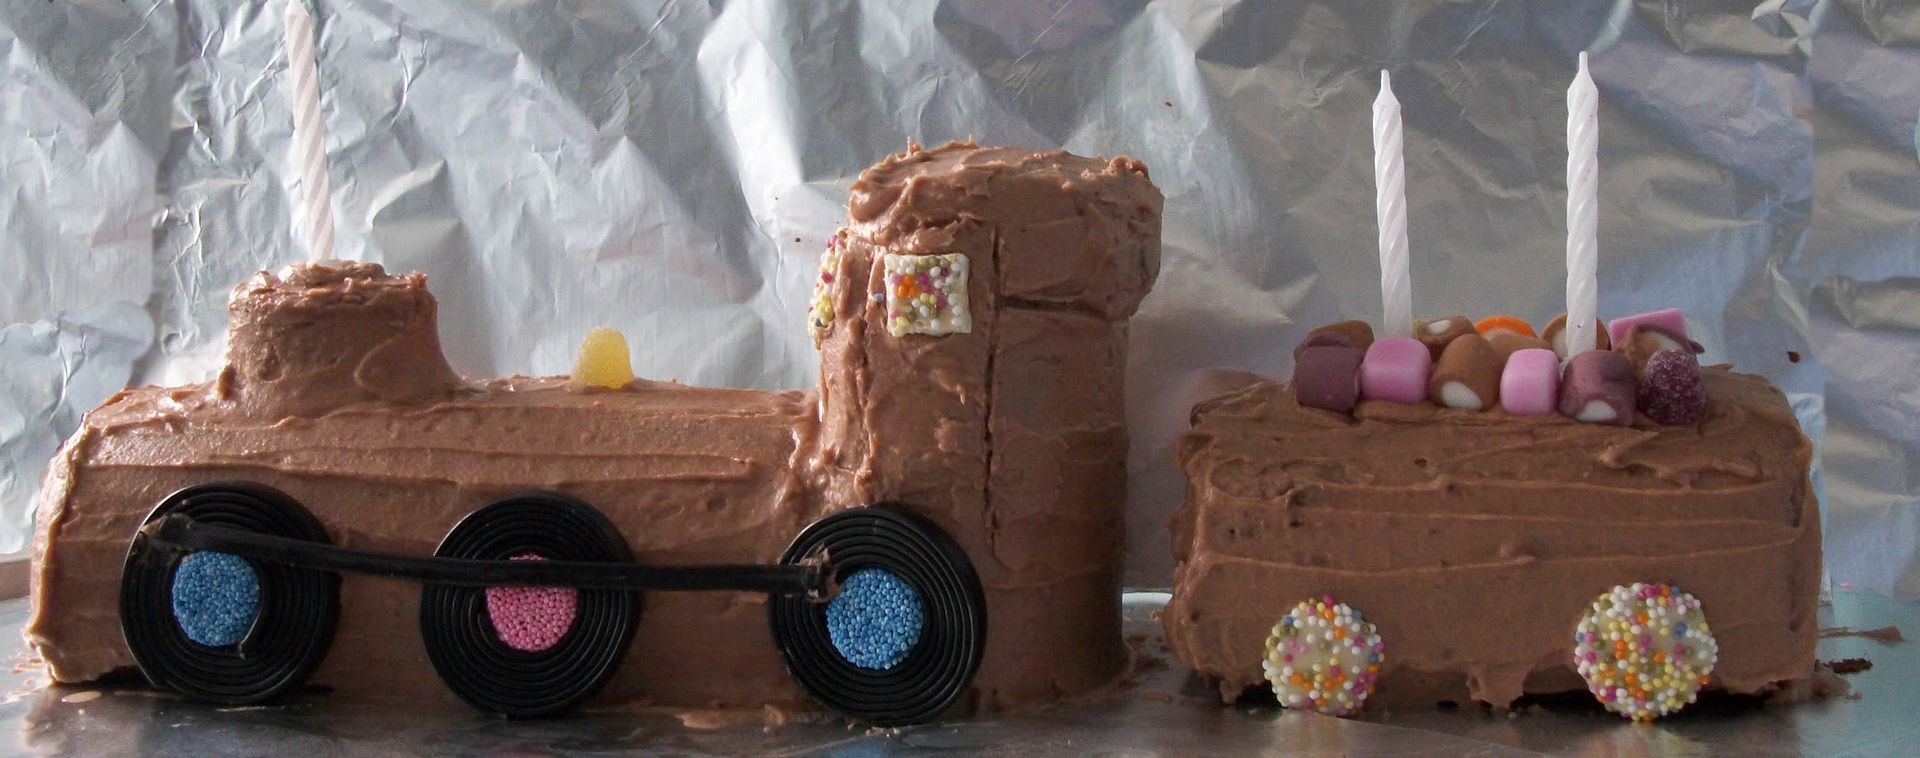
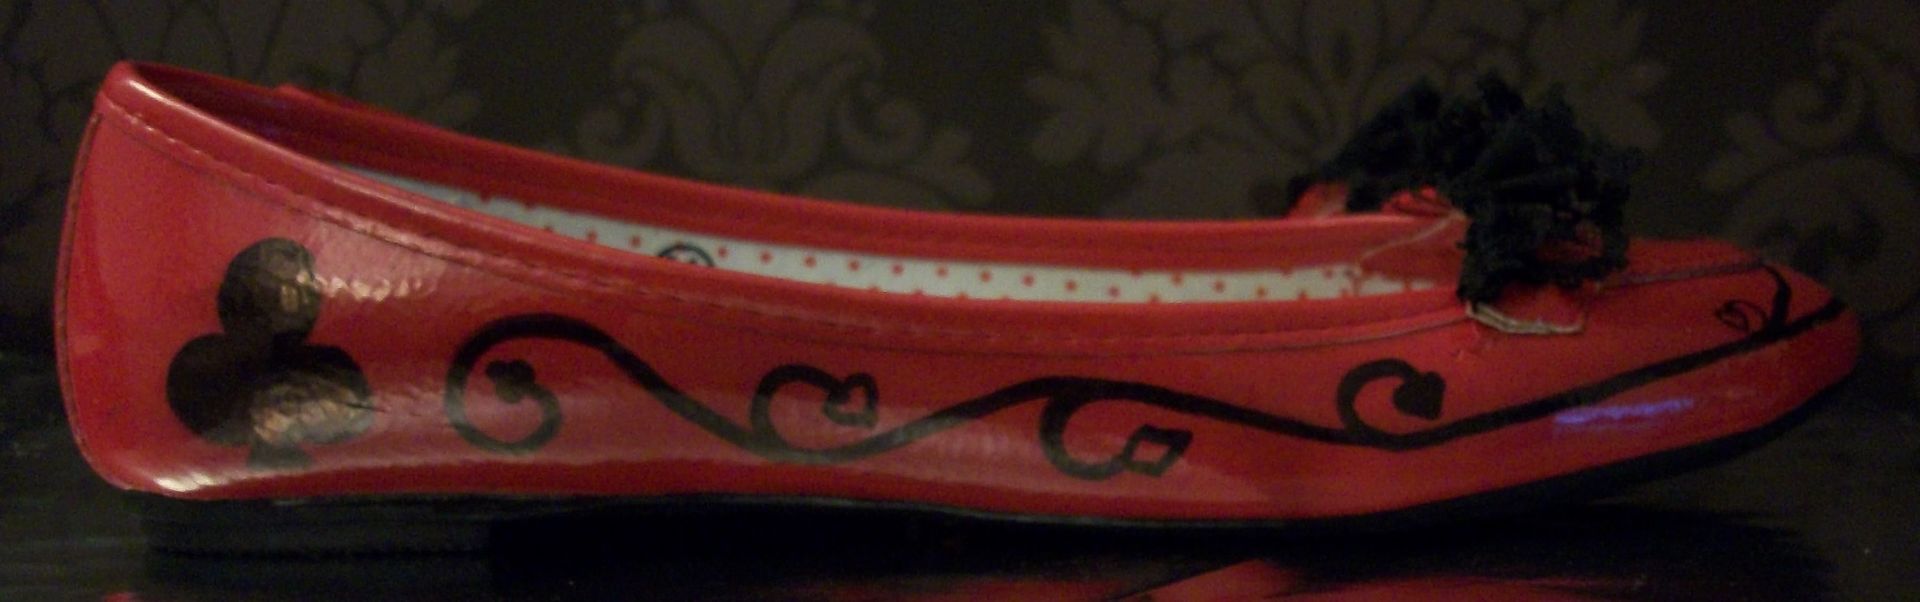
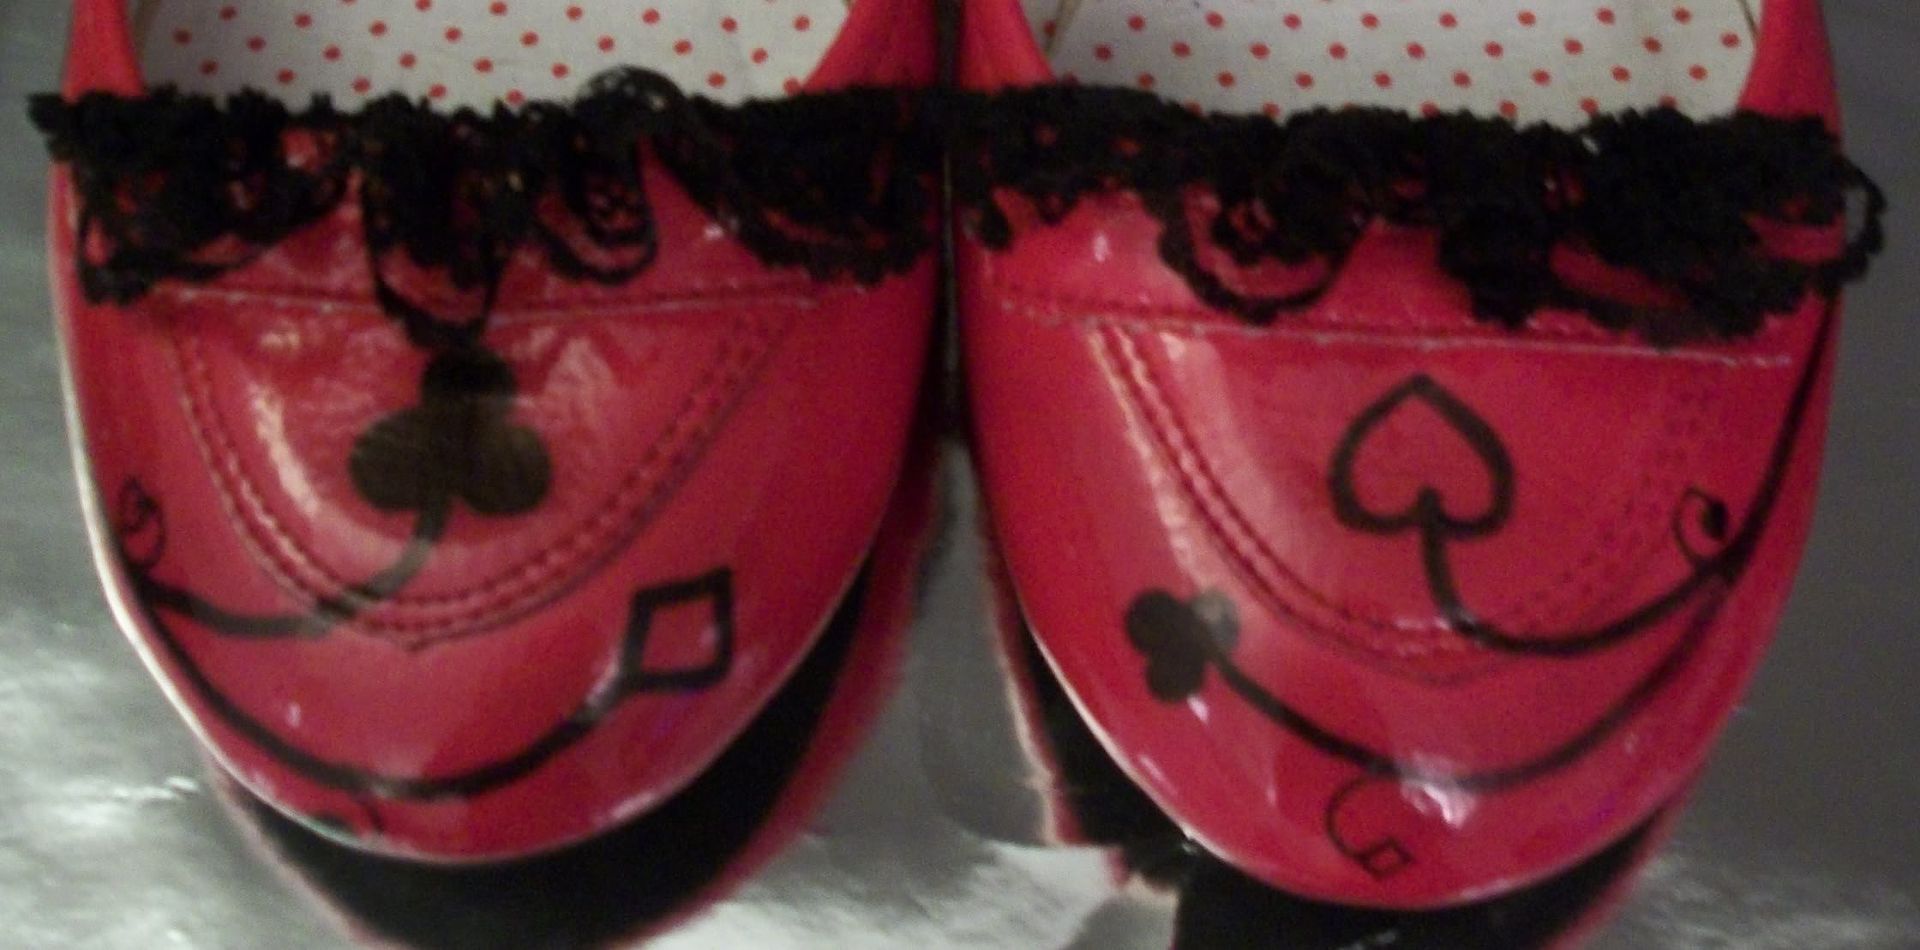
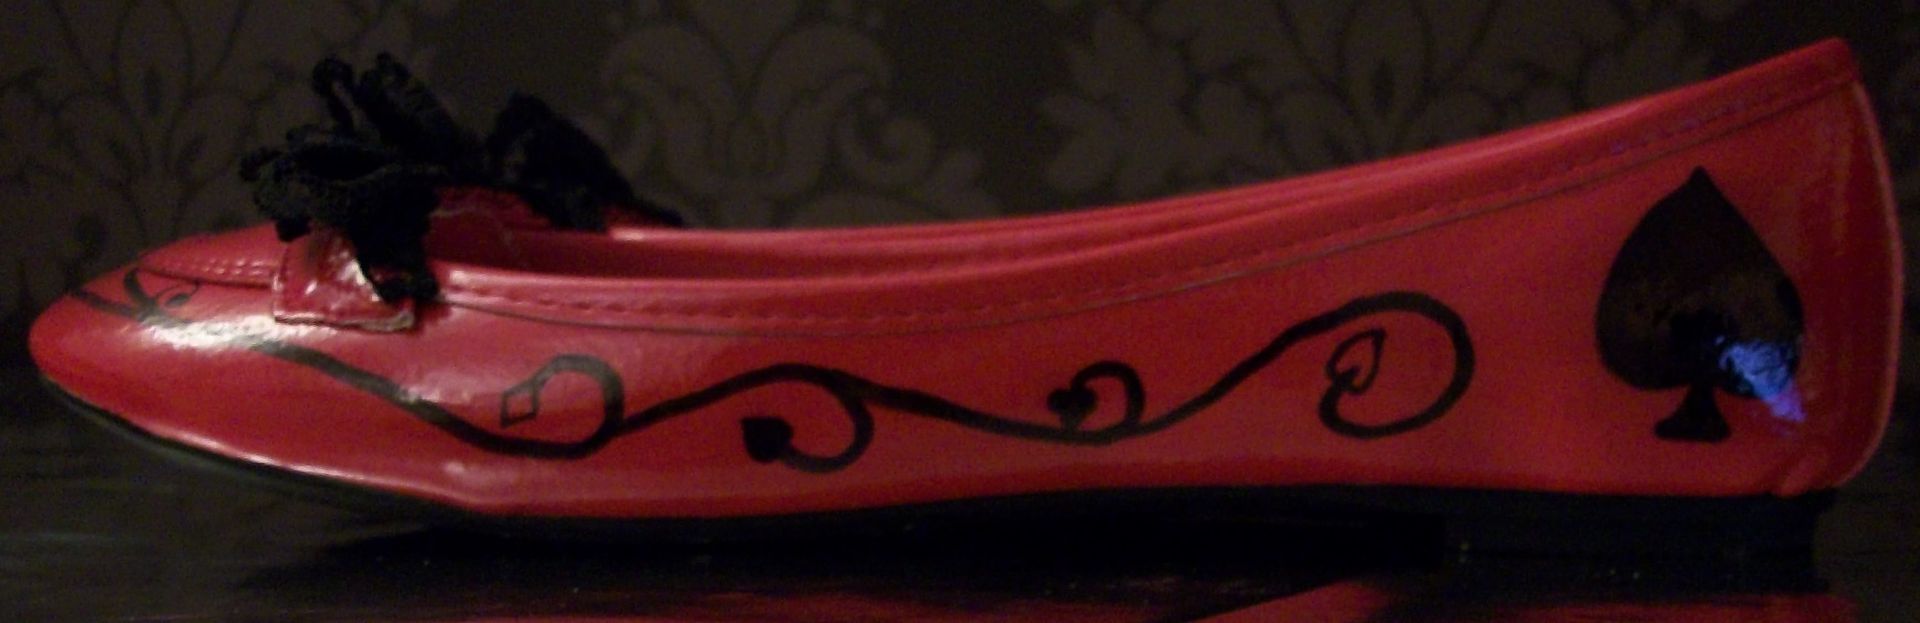
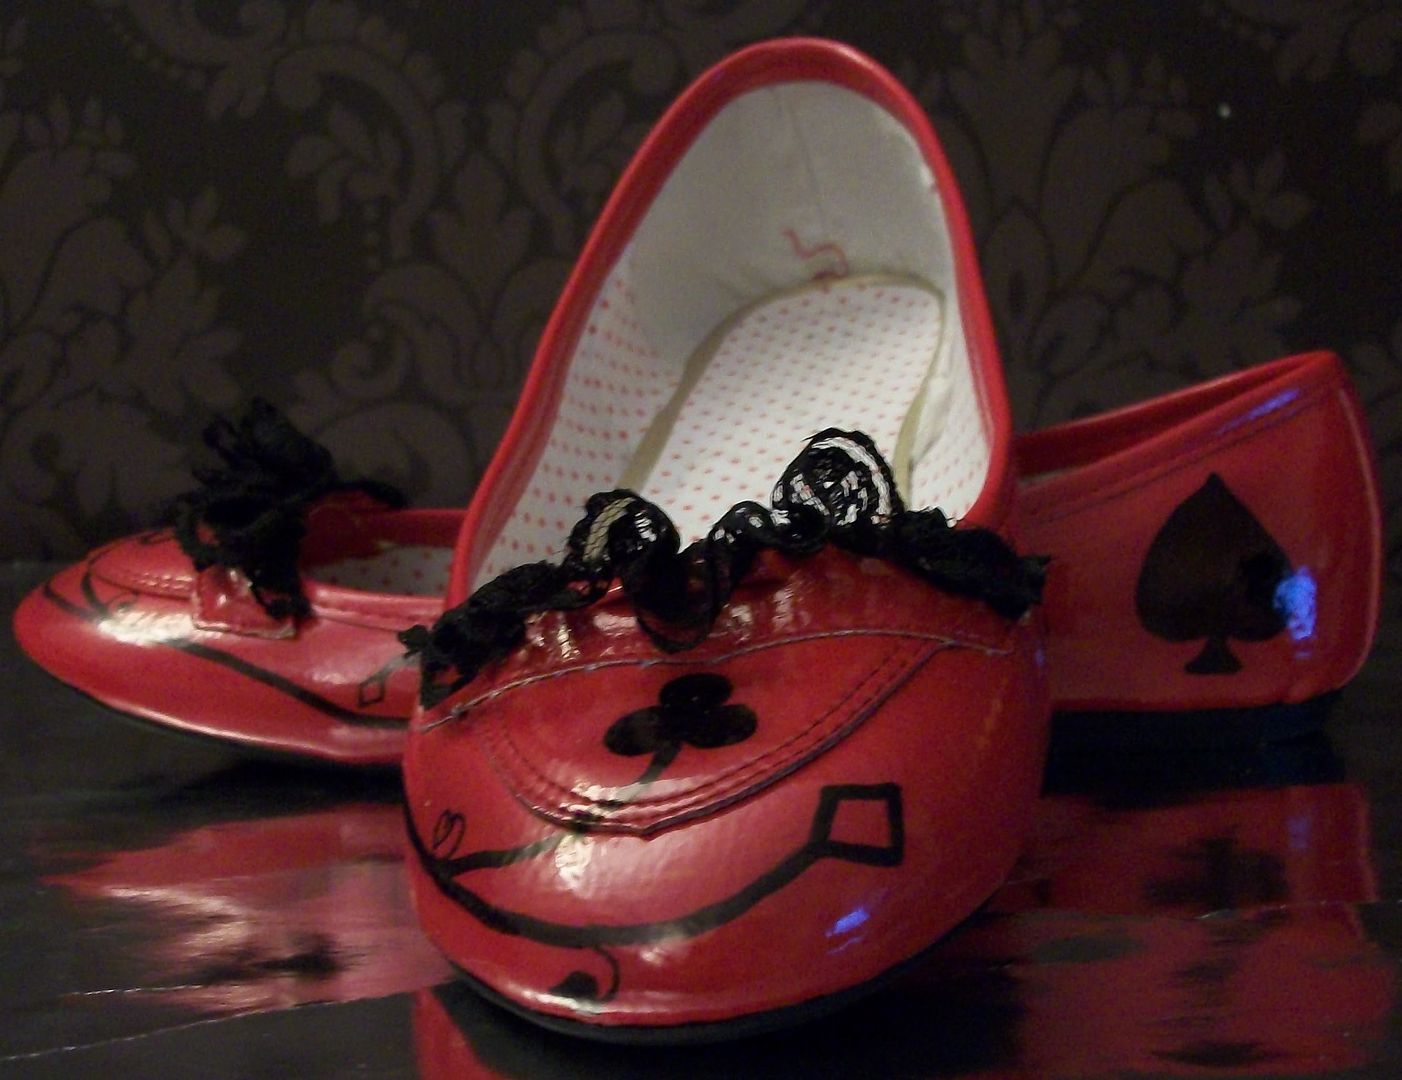
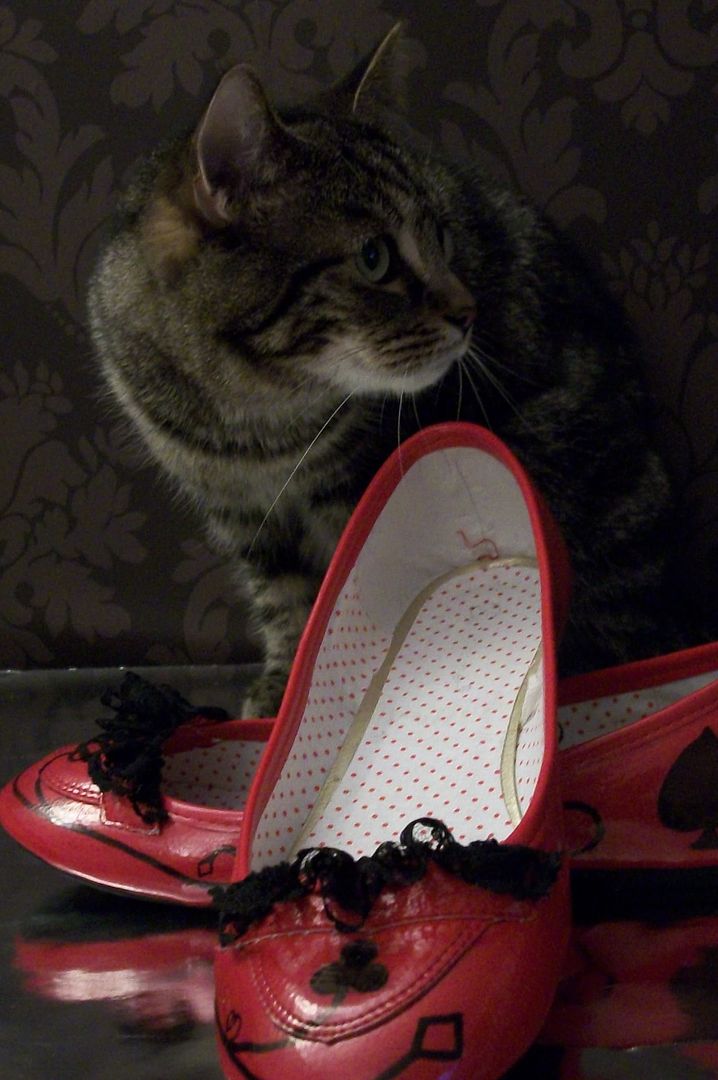
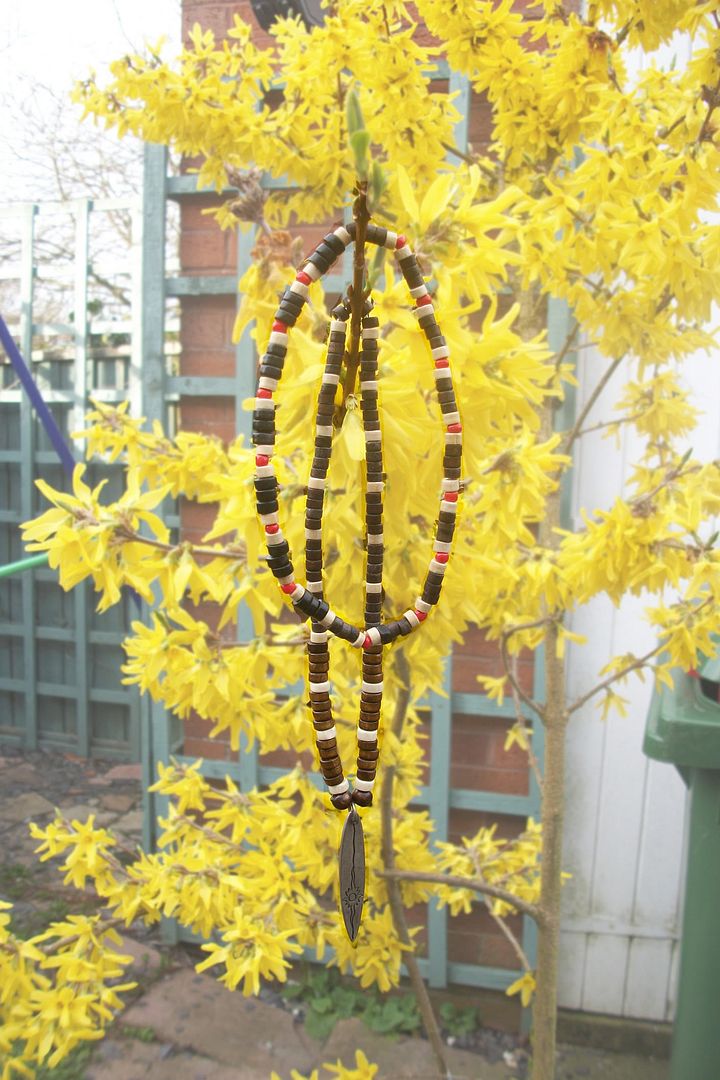
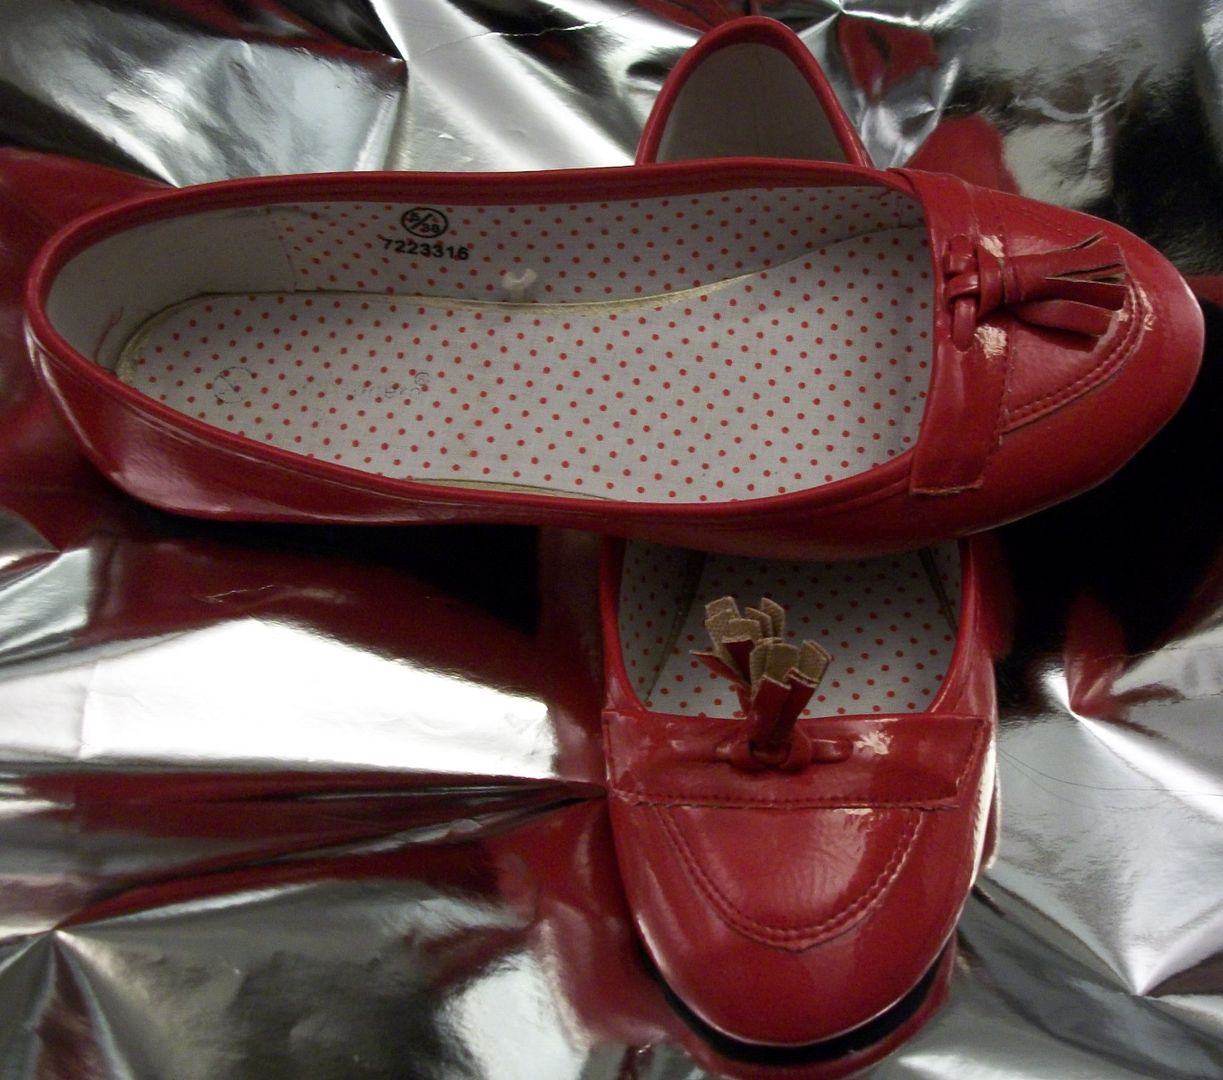
The tassle bits were horrible, and one wouldnt even lie straight down, but I could see that I could remove them easily, and liked the shape and colour of the actual shoe.

I started by removing the tassles. I then gathered some black lace and hand stitched it to the front.

I carefully drew a swirly card suits pattern onto the card in ink pen, and when I was happy with it went over it in black marker pen. I let this dry and wiped over it with a damp cloth to remove any ink left


The shoes are so happy they are even smiling themselves!
"I may not be a Cheshire cat but they're my shoes now, keep away, keep away"

“Fan her head!” the Red Queen anxiously interrupted. “She’ll be feverish after so much thinking.”

Saturday 3 April 2010

Rough with the smooth

99% of the Scrapbook pages I see are happy, joyous pieces of work, a celebration of an event, person or other memory, I believe this gives future generations a false outlook of our lives, so sometimes I just have to scrap the downsides of life to give a whole picture.

I'm almost ashamed to say that one of these times was my pregnancy with my second son, maybe its because apart from morning sickness and a long labour with first son I had a fabulous pregnancy, I glowed, I was still had a tiny waist from the back view, and I felt good; with second son it couldnt have been more different. Through all the bad times though the outcome was definately worth it, I wouldnt change Kai for the world, and should count my blessings as, though I didnt realise it at the time, on of us could well have not been here now.

For all those who hate bad pregnancy/labour stories, do not click on the pictures for a close up of the journalling.


I didnt WANT the pages to look depressing, even if the journalling ended up that way. The border was already on the background, but I found this looked very flat so used a knife to cut slits for the photos and strip to fit through.


I wanted the main focal points to be the journaling and then the photo. I printed the journalling onto a similar blue paper as the background, and then put it in the centre so it was the main focal point. The photo I mounted onto yellow to match the page border and kept them at the bottom so eye would follow the story down to them.

The band was added to give interest and balance to the page, as was the stickers/chipboard.


The title I wanted to blend in a bit more with the background so I used the craft robo to cut the letters out of pale yellow.
The final 3 page layout.

Linkwithin

Related Posts Plugin for WordPress, Blogger...