Showing posts with label Papercraft. Show all posts

Wednesday, 18 January 2012

Bookbinding

Look Lizzie, I did it, I did it!!!!
The front
Lizzie gave us a great lesson on book binding with Japanese side stitch when we met her in Coalport. Just before Christmas I gave myself a few hours off and decided to finish off the book I had started. Its not the neatest of books, but it taught me a few things and I'm sure my next go will look far better. What I was very happy about though was that it worked! Not only did I manage to bind my own book but it isnt falling apart, and is totally usable! I even scored the front cover so that it opens easier.
Inside
So what did I learn....

  • I need to pay a lot more attention to making the covers so that they are neat without the odd gluey finger print on them.
  • I need to buy a smaller needle, though mine worked the eye made the holes too large for the thread. This makes it look rather untidy.
  • That book binding is really fun & not only do I want to make more but I'd love to learn more techniques as well.
The back

Thank you Lizzie for giving me a new hobby (I'm sure Ryan (my other half) will be far less enthusiastic that I have another hobby to spend money on ;-)

Saturday, 3 December 2011

Altered book: A Melshionary with a secret

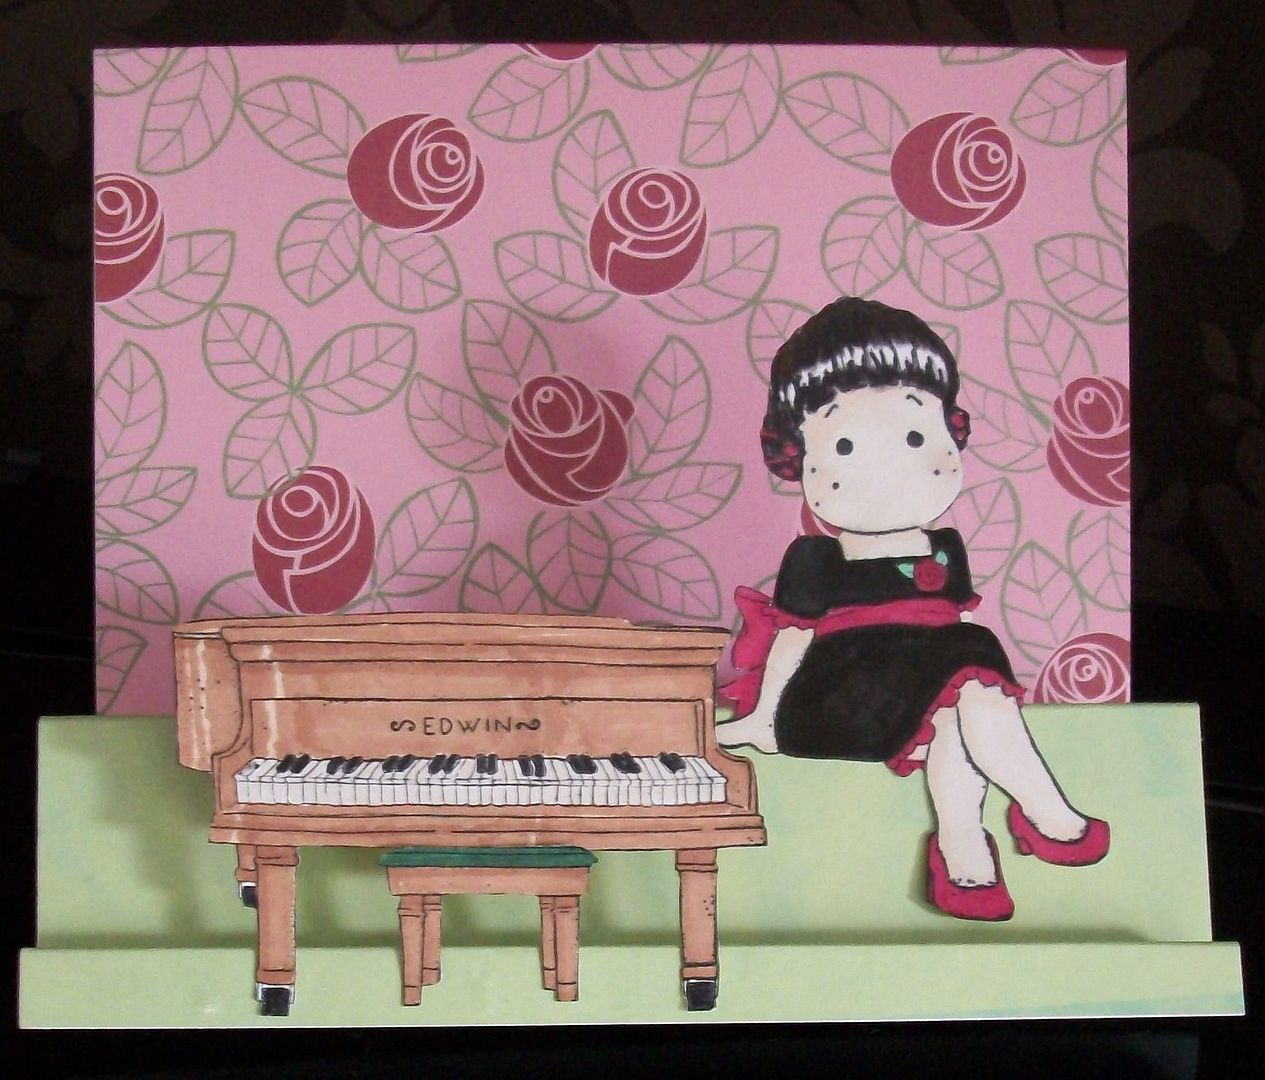
I'd been mulling over what I could give to Mel for her Pay It Forward, while looking around pinterest an idea formed in my mind. I know Mel likes books, as well as Green & Blacks chocolate so why not combine the 2.
I started off with an old dictionary
I attached some chipboard which would become 3d detail, and using thick twine I made a few large stitches over the spine
Then I watered down some pva glue (50% glue 50% water) and painted the outer covers with it before placing on top of a sheet of tissue paper. I used a dry brush to smooth it over & get the tissue paper around the chipboard. I didnt worry too much about creases & wrinkles, it would all add to the finished effect.

Next I mixed up the colour I wanted, I was aiming for a tan brown, like the traditional leather bound books of old, so I mixed up my poster paints, add a drop of pva & covered the book with it. This took a little while to do as I had to wait between coats & also to the front & back.

Once dry I started on the inside, I found a page with what I thought had a relevant word in the corner, "bake", and carefully cut out a rectangle using a ruler & craft knife. I repeated this until I got to a satisfactory depth, removing the inner layers as I went.

I then pasted the edges with pva glue & put a large book on top so they'd glue nicely together.

When all dry it was time for the finishing touches, the title along the front & spine along with "a K publication" on the back. I used peel off letters for these.

To give it added durability I sprayed with clear plastic spray paint.


I bought the choccy bar, laid it in & ... aghhhhhhhhhhh....it was too long. I contemplated nibbling the end off but that just wouldnt be nice now would it, so I cut a bit more from the bottom of the gap.

& so it was finished, a Melshionary with a secret hiding place.

Mel was very happy with it, she tweeted these photos she took of the finished item, Green & Blacks retweeted the photo of the inside!! My books famous ... well, kinda :-)

Wednesday, 2 November 2011

Photo booth

Many of my Pinterest followers would have already guessed I was planning on making a photobooth due to the items I've been pinning.

I basically cut the front off the box we had the washing machine delivered in & wallpapered the inside of it (the box, not the washing machine). The central piece of the box (the back) I covered in blue tissue paper to try & resemble the blue background you can get in photobooths.

I printed out several halloween images such as mouths & attached a stick covered in white tissue paper (they were originally green which looked awful so I covered them) Other props I cut out of coloured card, sometimes adding embellishments.

I set up the "photobooth" with a stool inside & my camera set up on a mini tripod & a table. Then I got the kids to take it in turns posing ... heres what they came up with with the props


Kai even began adding his own props.

The kids had great fun with it so watch this space as I'm sure we'll be taking some more shots with different props soon.

Monday, 25 July 2011

A thank you gift for teacher.

I spotted some blackboard mugs in The Works & thought what a FAB idea for teachers.
Unfortunately I'd forgotten to buy wrapping paper :-( Then **ting!** I had an idea....
What wrapping paper could be more precious than paper decorated by Kai himself so I set him on a looooooong piece of paper with stamps & ink pad. It worked perfectly.

Tomorrow I'll show you the little extra pressie I made for the teacher that had Kai's group & therefore had the most to do with him, plus she is lovely :-)

Tuesday, 19 July 2011

Yeehawwwww Cowboy!!!

Here's a scrapbook page I made to show off Kai in his cowboy outfit.
Each plank of wood you see has been cut out and stuck on  to give the shape of the saloon. I also add black & brown card to add more detail.
The letters "Saloon" are stuck onto the back of a tag I aged with a bit of black ink.
I added a circular journalling circle which reads....
"Kai's nursery class dressed up as Cowboys & Indians for red nose day" & then dated.
As it was only Kai that was important in the photo I cut him out & placed him in the scene I had created.

Monday, 18 July 2011

Sending a Hug.

A dear friend of mine was/is having a hard time & I thought she could do with a hug, unfortunately she lives quite a distance away and I didnt think a cyber hug was enough.
So I sent her this

Saturday, 30 October 2010

Spooky papercrafting

Its that time of year that everything goes a little bit spookier. I love this time of year, its when I get the chance to buy some of my favouritist goodies - plenty of skulls, bats and black lace work in the shops.

In our house we use a mixture of both Halloween and Samhain traditions, and both are a great excuse to get the kids being crafty (like they need an excuse!). This is what Zack has been upto this morning...
They are cubees. I discovered Cubeecraft while looking around deviant art, I discovered some Dr Who templates Cyber Drone had created and looked around others he had made. These are only 3 of many, and I LOVE the skeleton. They are quite simple to put together, and Cyberdrone allows you to download them for free. If you follow his links you will be led it a world of fascinating cube shaped people and creatures, well worth a look around!

Sunday, 3 October 2010

Pink Mask

After seeing the previous mask I made (see here) Tams asked if I could make a pink one she could buy for her daughter so I set about making this one ...

I got the feathers from a feather boa, and the stick from a balloon holder which I then wrapped in ribbon. The butterfly is from an old hairclip which I put new wire & pink beads on. This was stuck onto 3 pink roses surrounded by leaves.

I then sent it off to give Tams & her daughter a surprise - I'm not sure how long it'll last in the hands of a 3 year old as its predominantely made out of card & paper but I'm sure she'll have lots of fun finding out.

Tuesday, 10 August 2010

Celebrate Life

Frosted Designs set the challenge to do a page that "celebrates life", I thought a page for Kaidys naming ceremony would be perfect.

Some of you who read my other blog will already know, but for the benefit of those who dont..
Kaidy was born 10 weeks premature, she was in the intensive care unit for a while, all wired up and having everything done for her. She grew well & was released from the hospital. Shortly after it was discovered she had Hydrocephalus (water on the brain), she had to have brain surgery to have a shunt fitted to drain the fluid. She already had a small amount of brain damage that caused her mobility problems in her one hand so they used this to drill through to attach the tube. This has possibly caused more mobility problems with her one leg but was obviously necessary. If her shunt is banged she has to be rushed to hospital with her notes within 20 minutes.

For such a little baby she has been through so much, but you'd never know it to look at her. She is always smiling, and is chirpy as anything, so it was nice to celebrate her 1st birthday and her naming ceremony.

Not only that but family came that we hadnt seen for years, including Grandad Alf. In the photos you can see 4 generations of the family.

As you can see I used a lot of different dotty papers, I think this will be a theme for Kaidys pages as when she was born my brother, her dad, said she was just a little dot, and the name stuck.
The pictures are inorder they were taken in, and as the main subject I put a large photo of Kaidy.

I used a photo for the title, this was on the wall behind where the ceremony took place. I cut it out and put it at an angle to make it stand out a little bit more.

Thursday, 5 August 2010

Masks...

I was toying with the idea that we all hide behind some sort of mask, some peoples masks being more translucent than others but if we look properly I think we all do wear them, maybe its to hide how we feel from somewhere, to give a different persona to the outside world etc, which led to this layout...
I started out looking at masks & decided to make a masqurade mask, I've always loved these masks. I made a template to play with & then set about with card & paper of my favourite colours ... black & red of course :) 
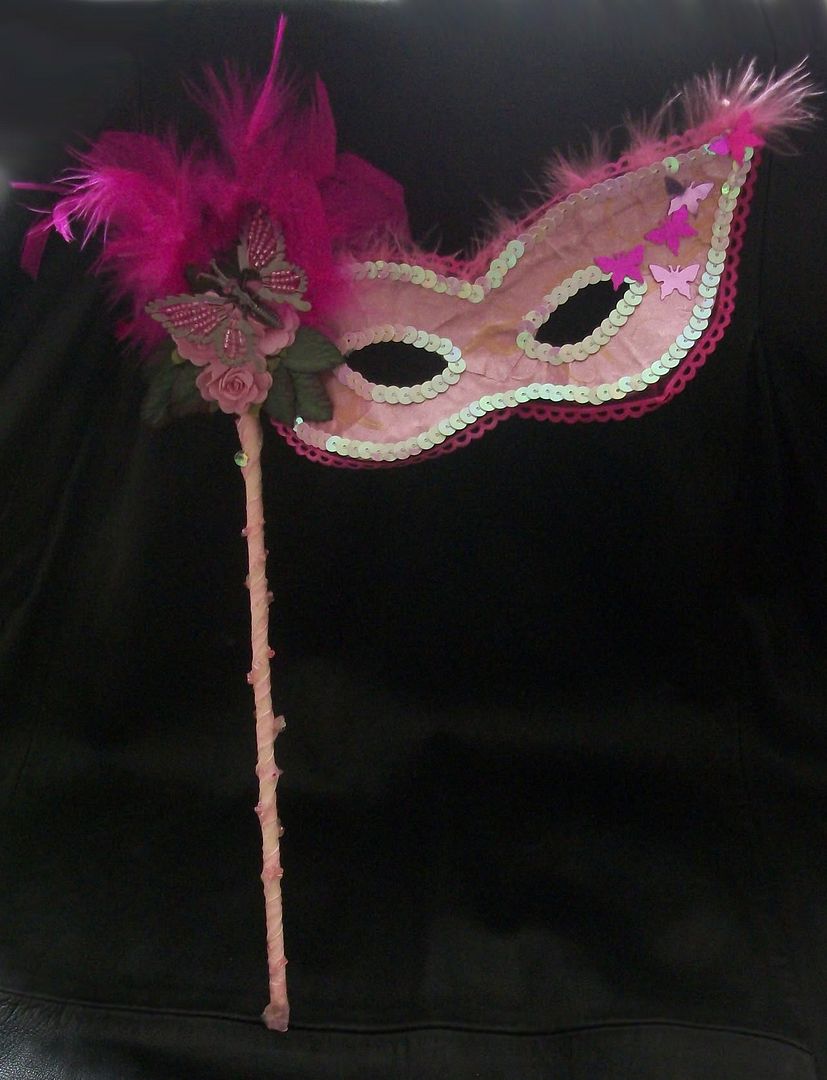
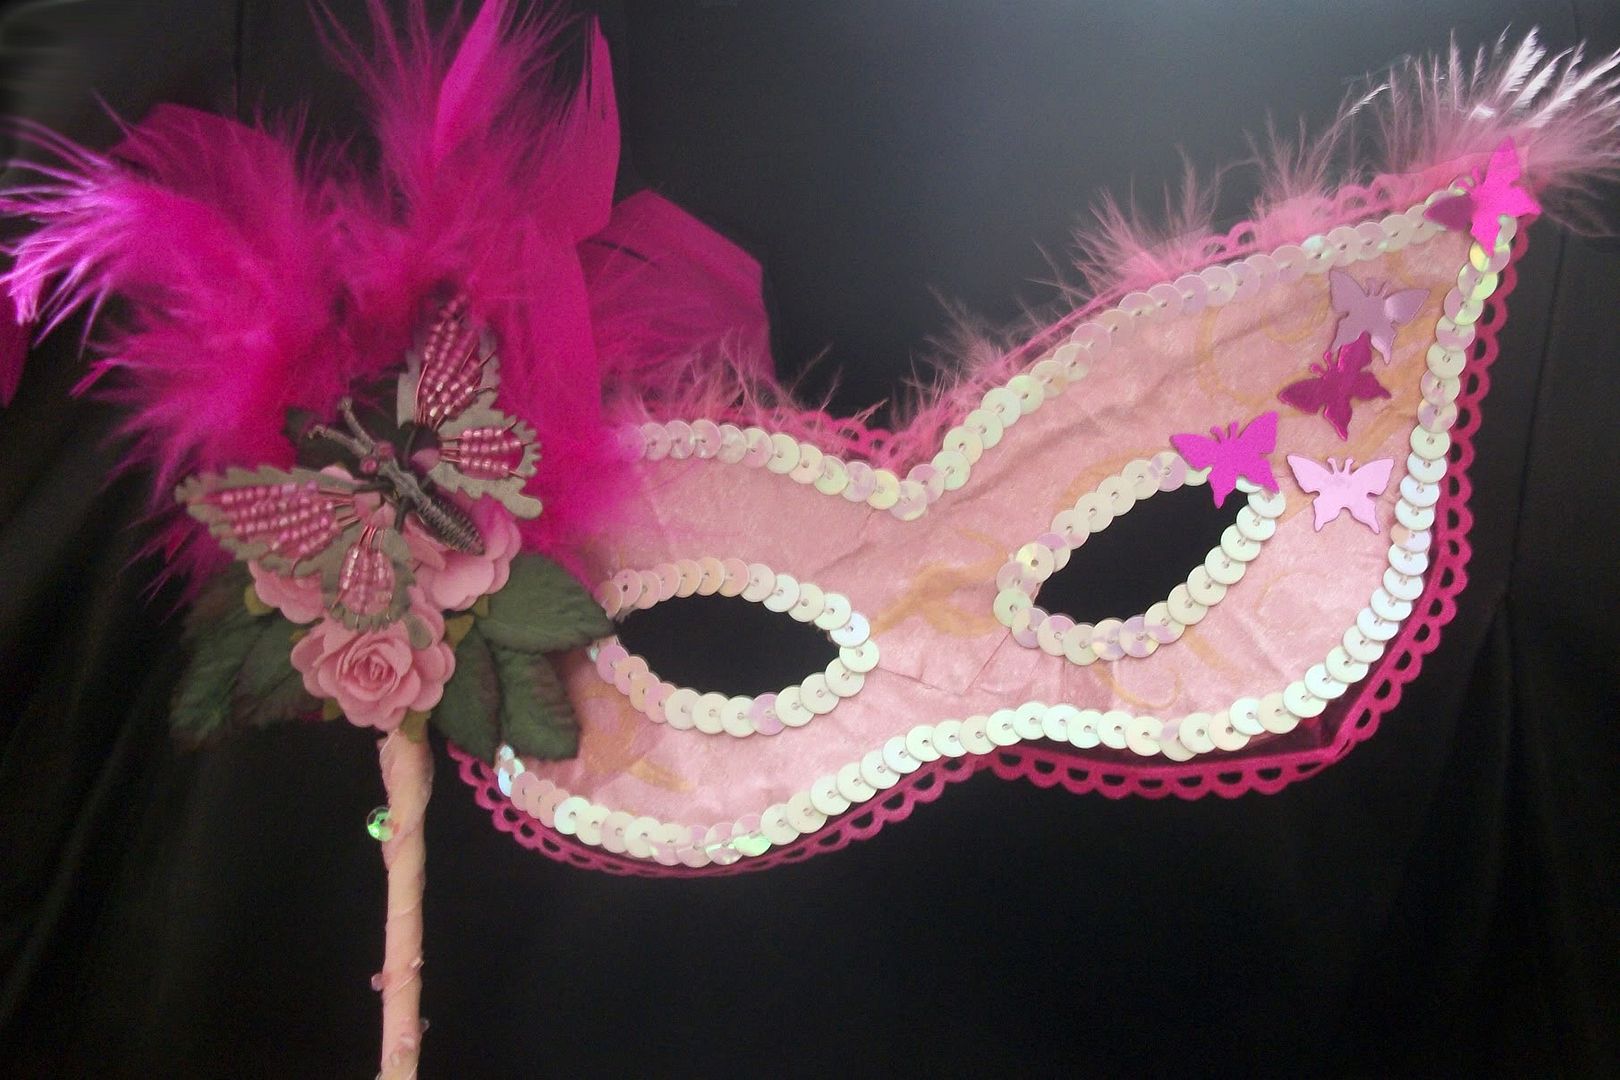
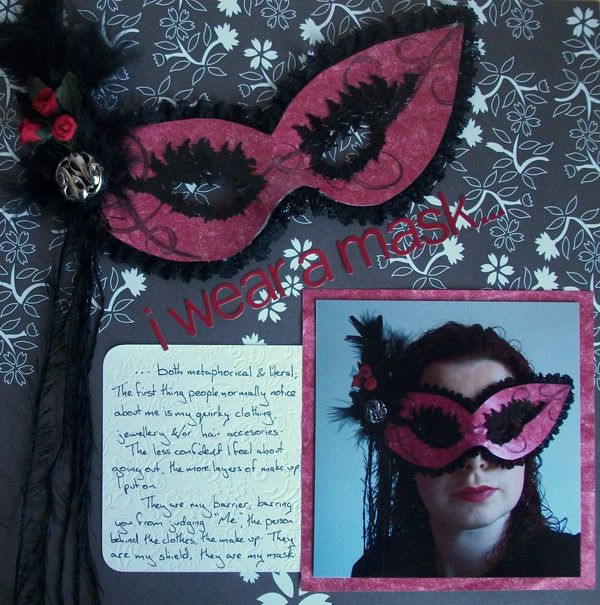
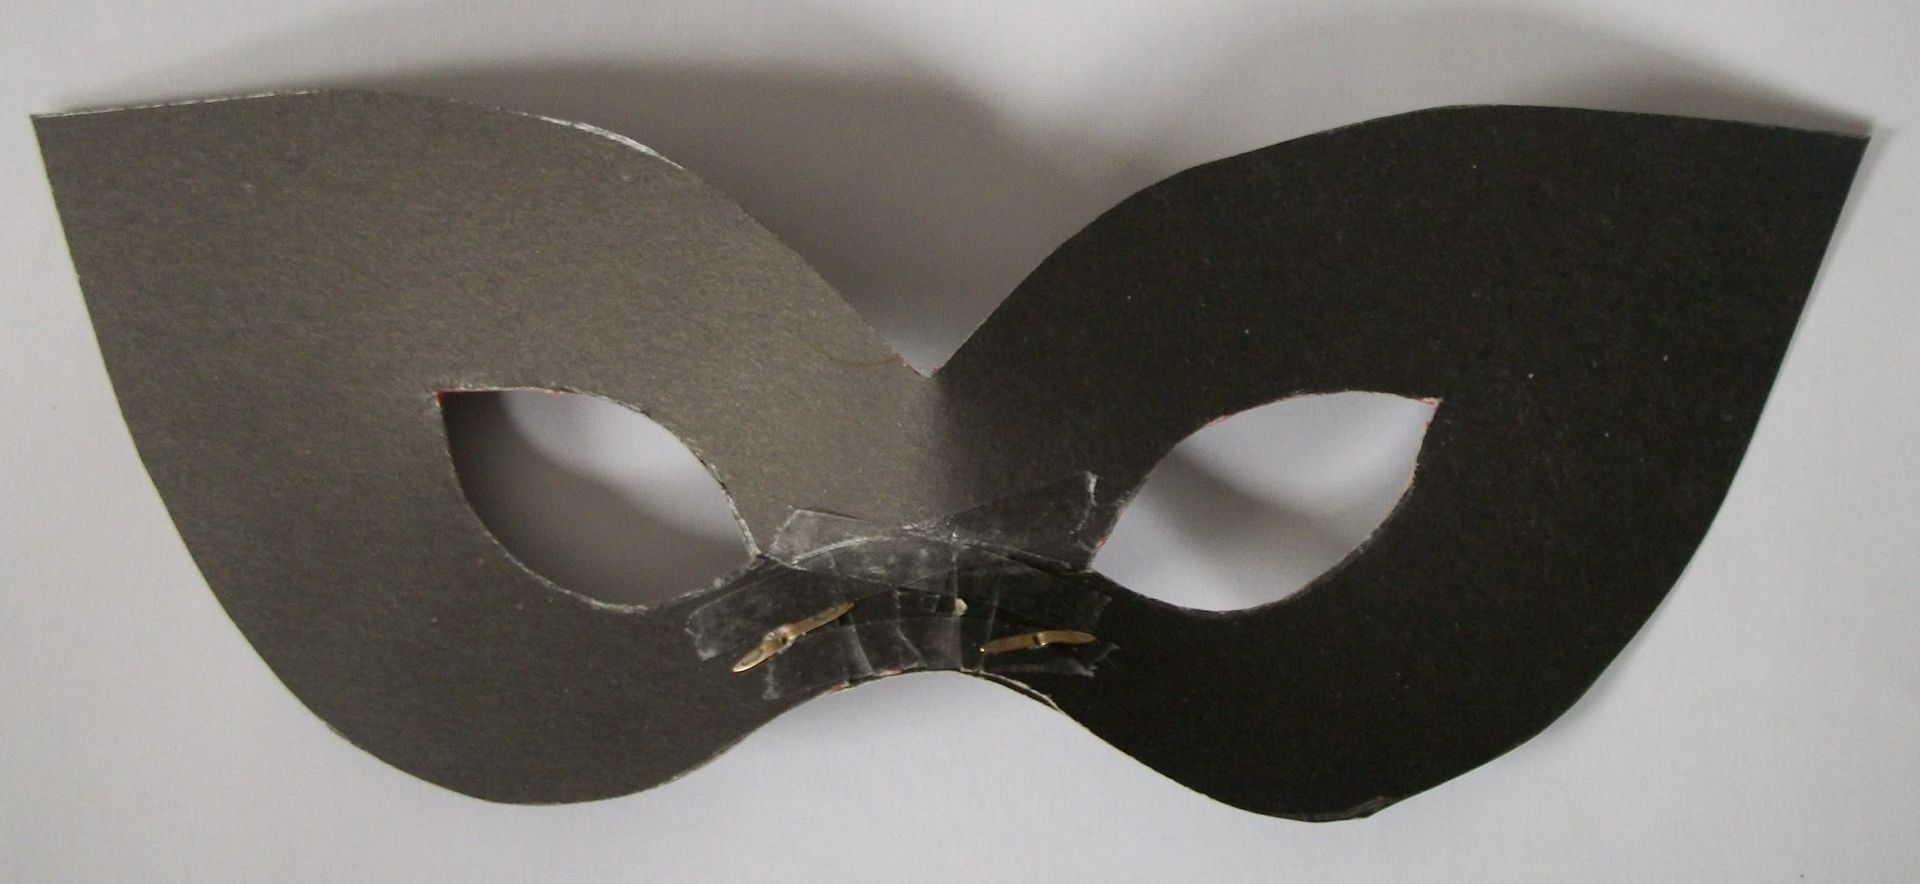
By adding a nose piece I could make the mask 3d rather than flat, I did this with the black card before adding the red paper which I'd stamped & wet embossed swirls onto


I added black lace all around the edge, then framed the eyes with confetti, if you look closely you will see above the eye they're witches, and below is bats.
& then I started the piece de resistance .. I found a gorgeous swirly button on which I attached 3 red roses, leaves, feathers and some thread before fastening to the mask. Finally all I needed was a black stick for the photo I had planned. I simply attached this with masking tape to the back as I didnt want it to be permanent.
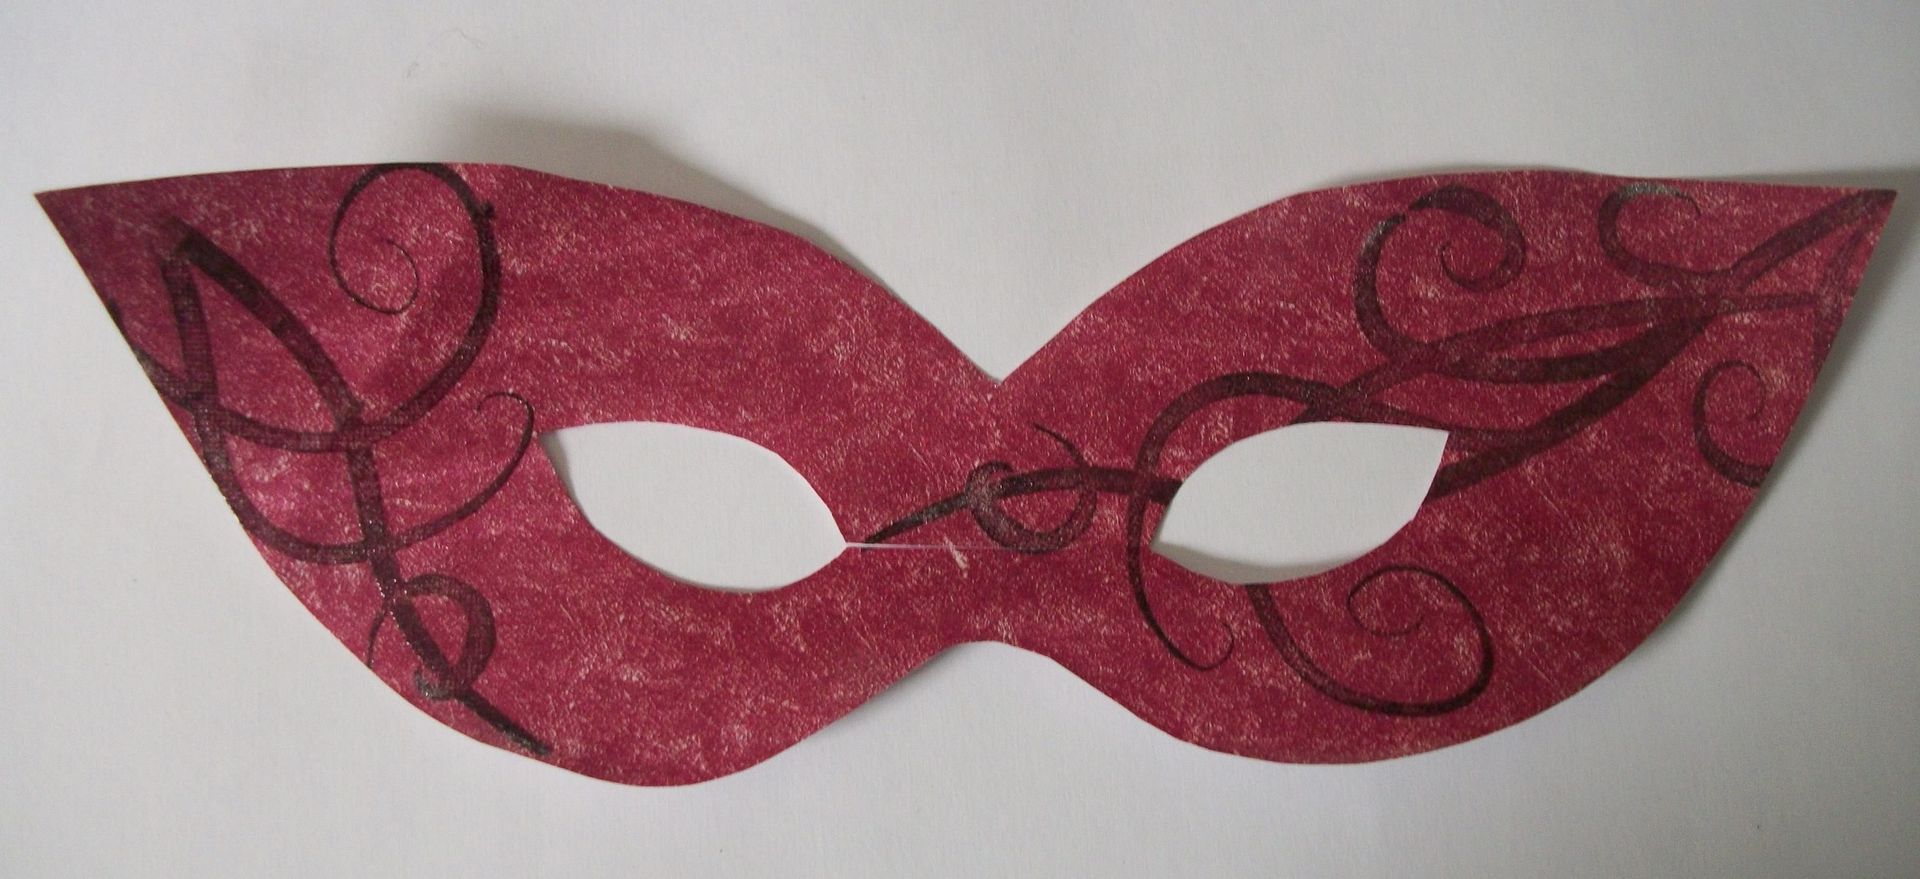
With the photo for the layout I learnt I am awful at doing self portraits, maybe its because what I see in the mirror never comes out on the photo, maybe if I flipped the image it would look better to me.

The journalling was done on the back of a piece of laurence Llewelyn-Bowen 6x6 sheet. It was beautifully embossed and the back was perfect for writing on.

This page will become part of my "About Me" scrapbook, a rather self indulgent album, but it'll be interesting to see how I change over the years both in attitude, style and looks, and my family may learn a bit about me, especially when I've gone (I know, I'm rather morbid, lol)

Sunday, 25 July 2010

Summer Fun Box

With being a "scrapper" I collect leaflets, newspaper clippings, tickets and anything else that I can use on my pages or will jog my memory. Until the page is done these normally hang around in a large tub or plastic bags, both of which are impractical in their own way, so when I came across a battered box while sorting out my craft cupboard (yes again) I knew it would be perfect. But it couldnt just be left as it was now could it!


I covered it all in silver sticky back plastic and then started decorating it. I dont normally use sequins like this , specially not this high but I wanted a lot of texture.


I wanted almost a beach type feel, full of warmth and movement.
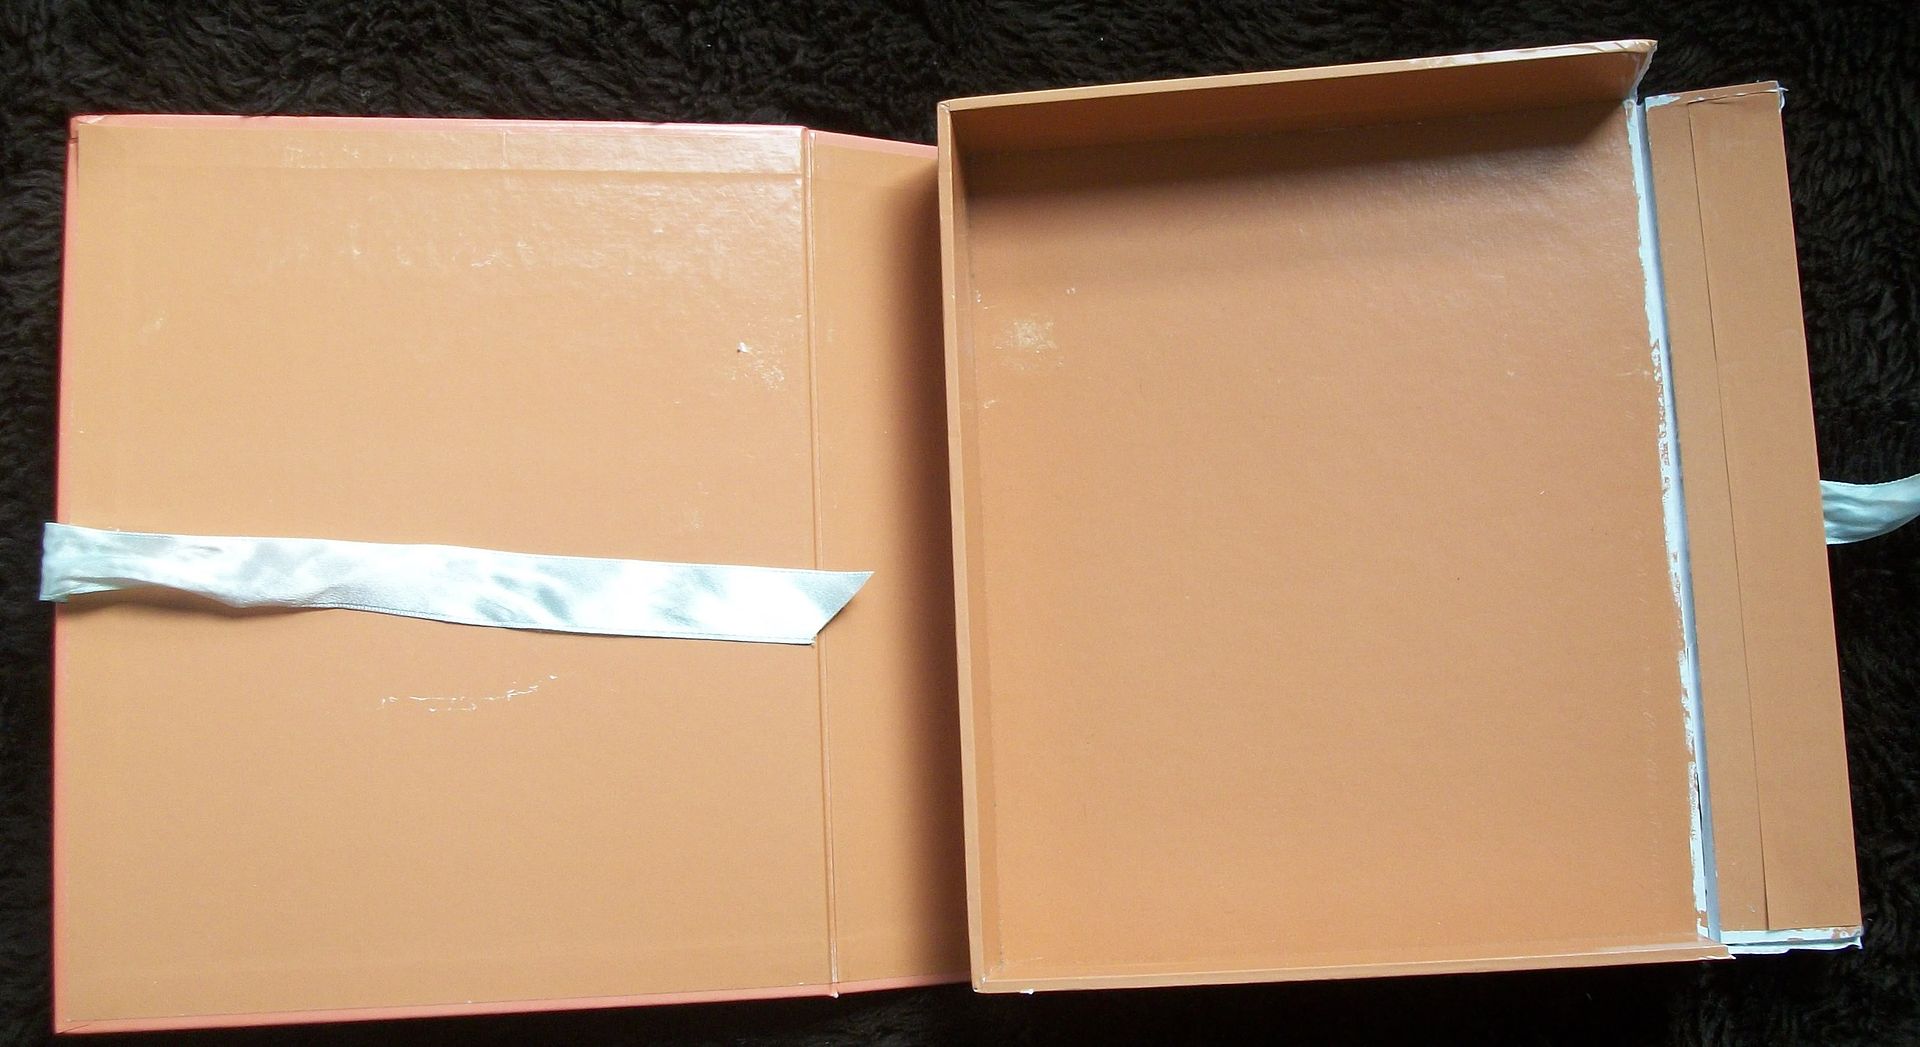
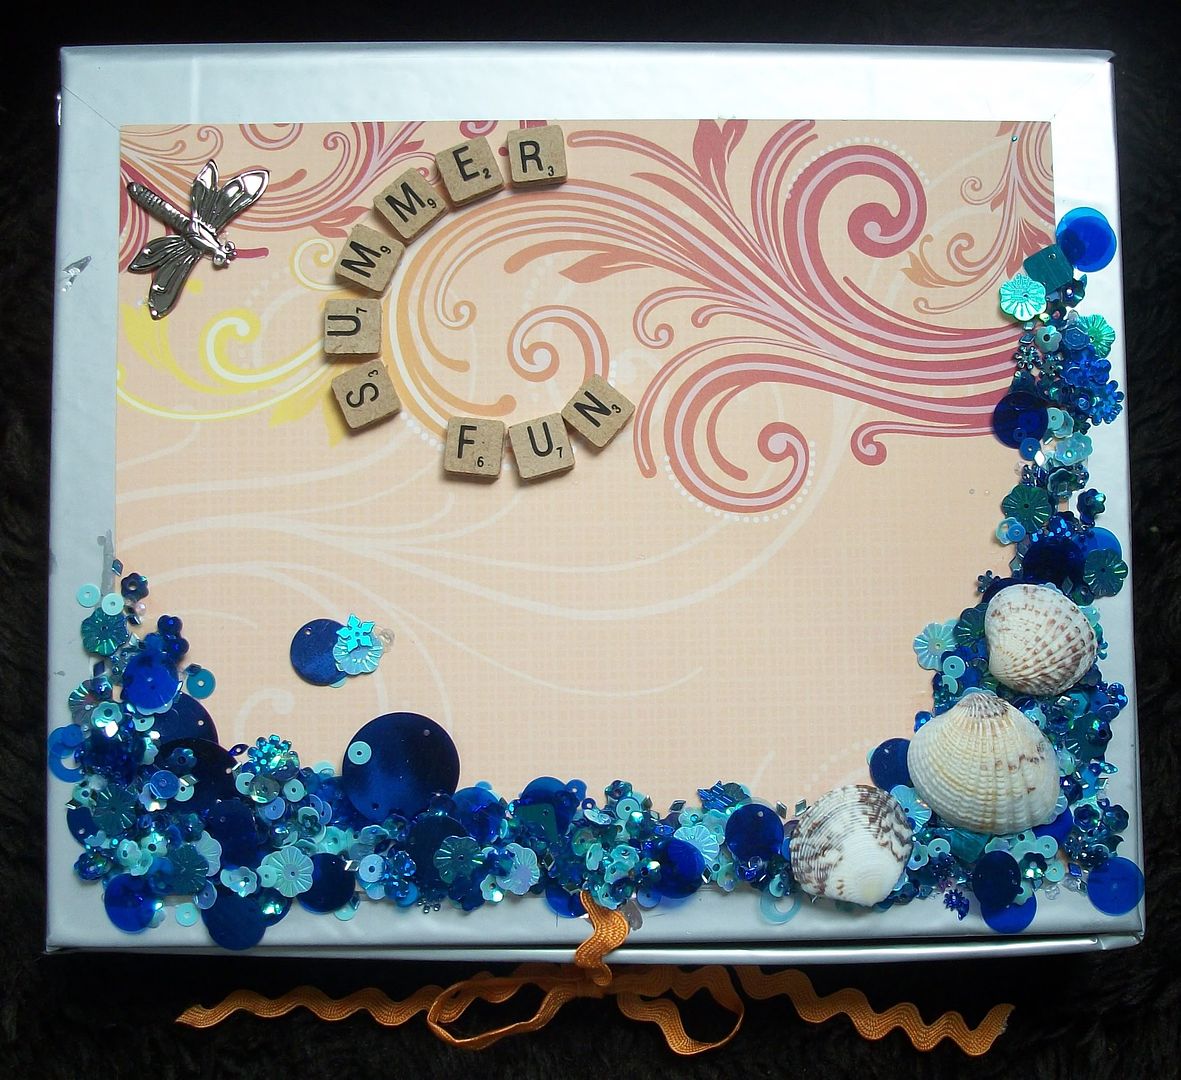
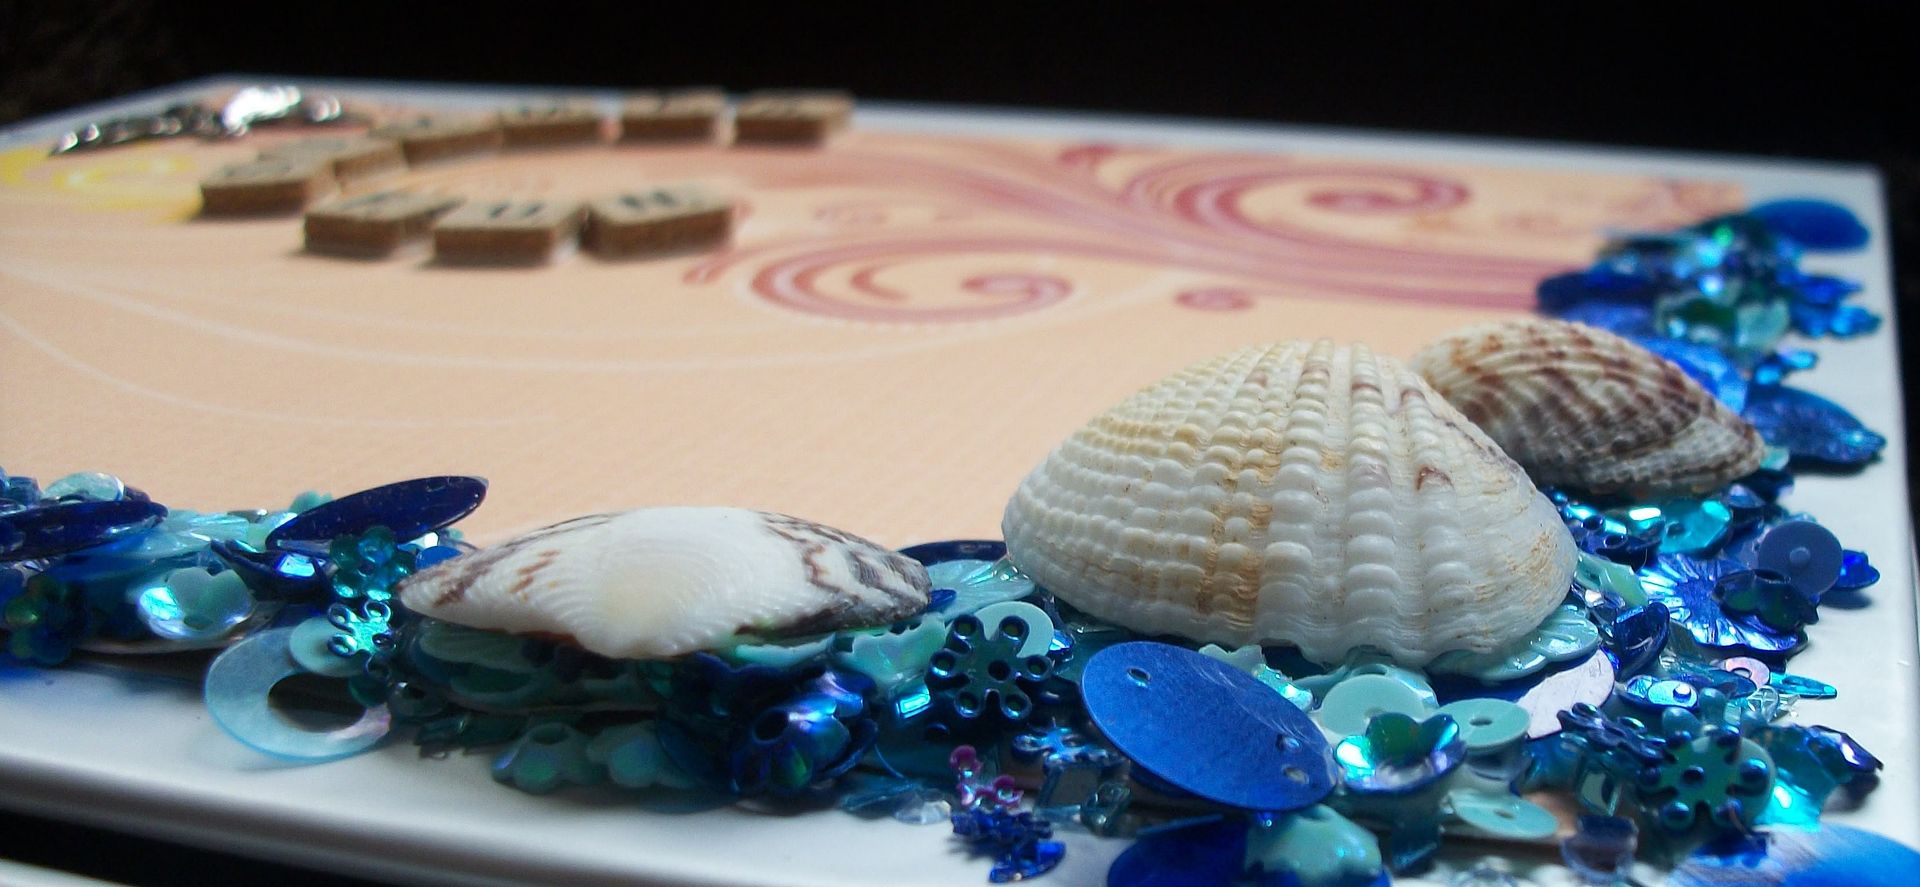
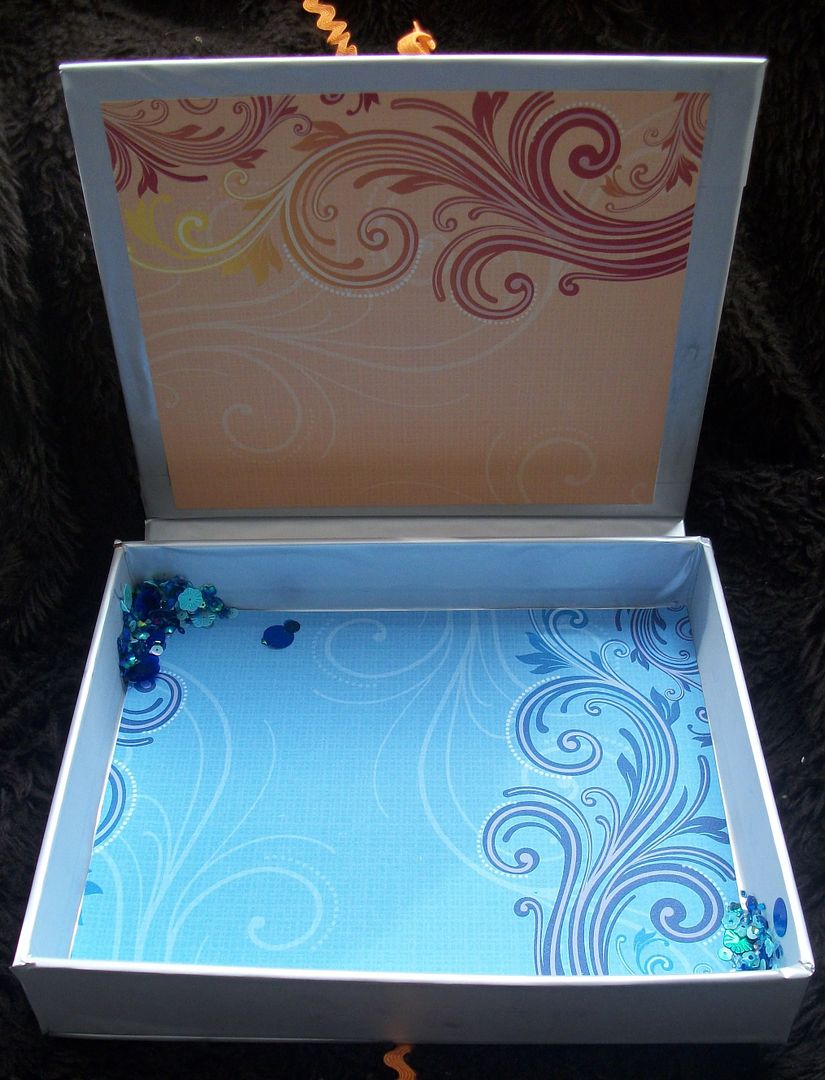
I used scrabble tiles to reflect the games & activities we do during the Summer holidays.


I would like to enter this into the Creative Craft World Holiday Challenge

Thursday, 17 June 2010

Boys card


This is a card I made for my nephews 6th birthday. I took squares of blue patterned paper and backed them onto white card, then layered that onto orange and blue patterned paper.

I used this daisy and dandelion painter bear stamped image and paint palette, coloured in with promarkers.


Thursday, 10 June 2010

Stair step card

I love this magnolia stamp, she just seems so elegant and goes with the piano perfectly.
I made a stair step card and covered the back with Llewelyn-Bowen Retro Rose, and the "steps" with a sheet of green paper.

I coloured in the stamped images with promarkers, then fastened the piano and stool to the front step, and tildas legs to the next step.
Simple yet effective me thinks.

Thursday, 27 May 2010

21st birthday

It was my lil sisters 21st birthday last month, and like all crafty big sisters should I made her a card (or 2)
Thankfully Kim and I have similar taste, though whereas mine is rather retro, goth, black and red, eccentric, shes more modern, emo meets townie, grey and pink, zany in attitude, so making stuff for her taste isnt too hard.

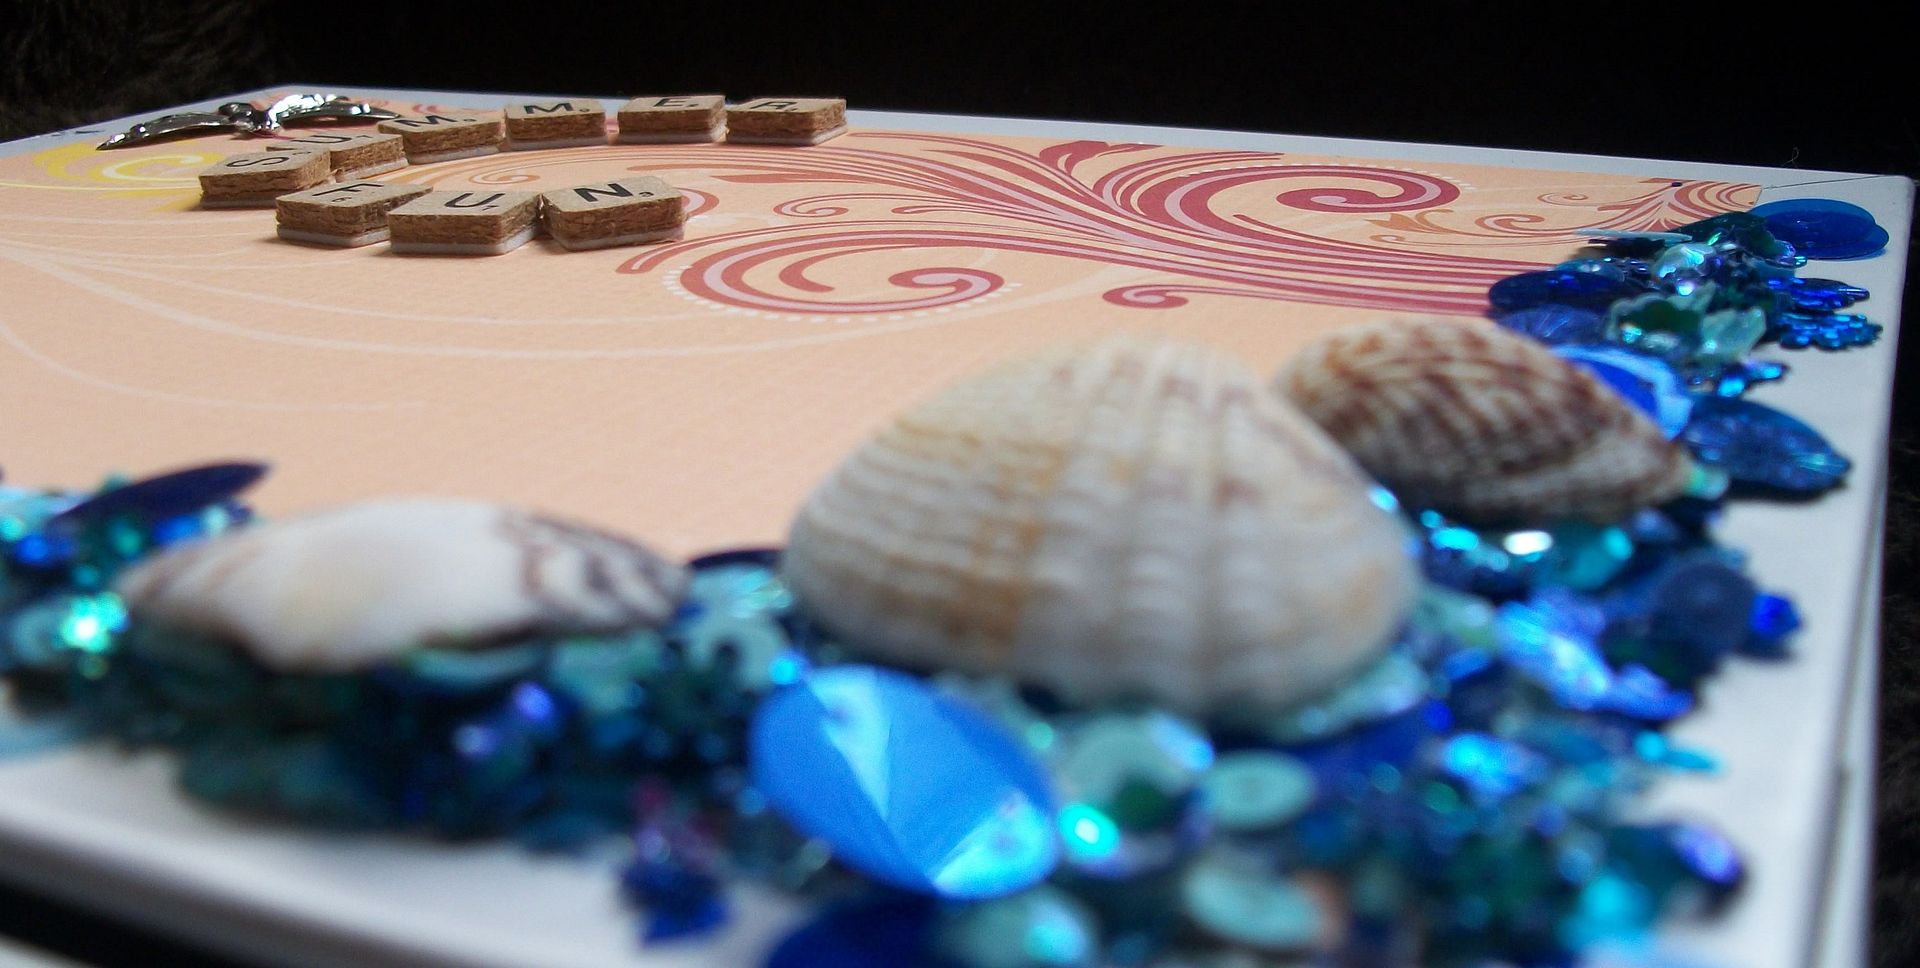
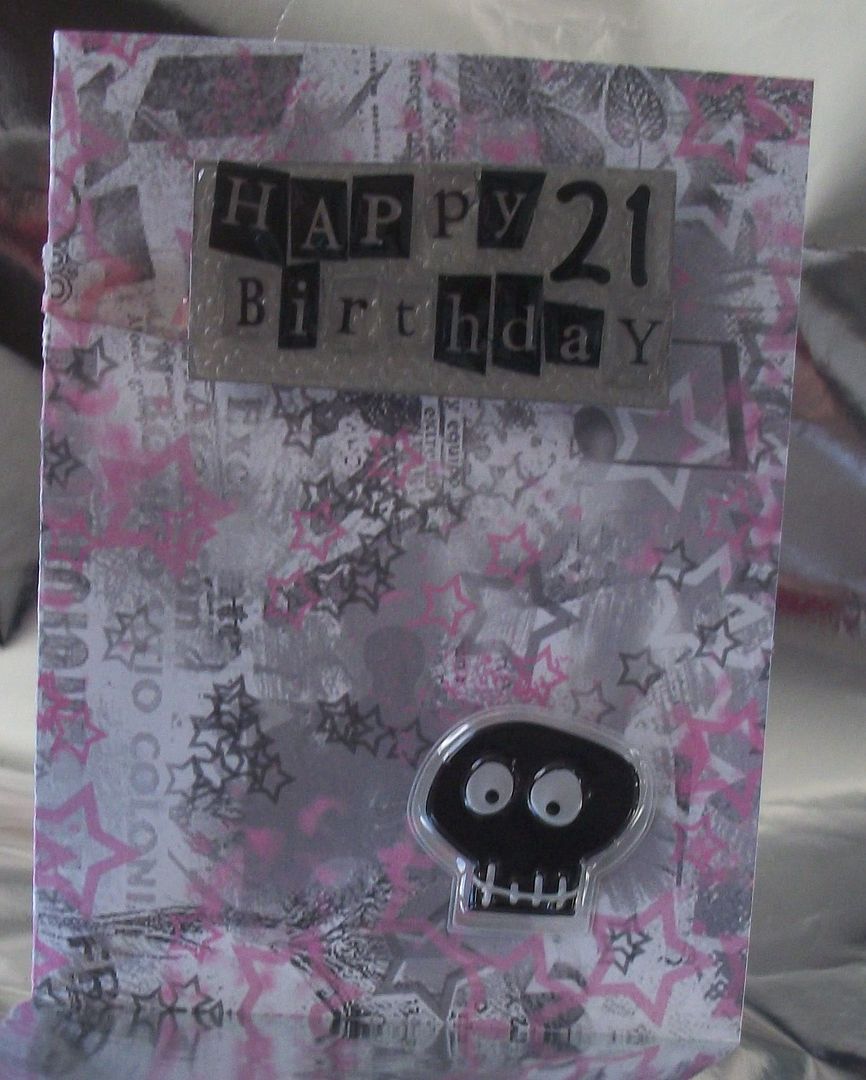
The first card I kept simple, patterned card with a 3d skull sticker. The letters were domed, but didnt look right when I stuck them onto the embossed card so I covered them over with glossy accents. You could still see they were individually domed but it gave them a nicer finish.
The next card took a bit more work....
It started off a bit like an exploding box, but the inside was a bit different....
The circle is folded up and attached to the sides so it opens out when the box opens. Onto this I stuck the letters, bottle and glass. The numbers are stuck onto springs I made out of card so they stick out more and move.
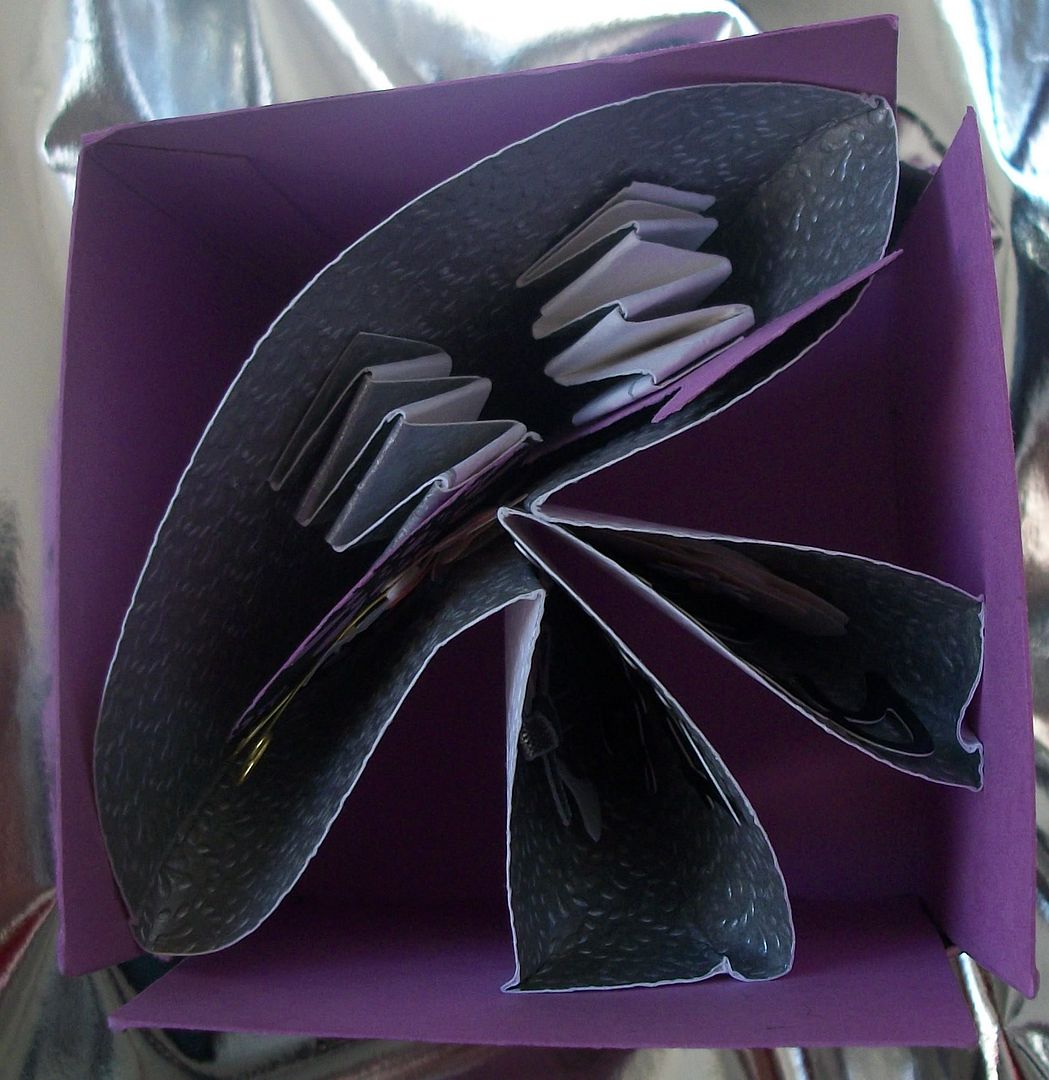
I need to work on this design a bit more to use it again though as when the box is shut it isnt very tidy at all, and thats just unprofessional ;)

Thursday, 20 May 2010

1st Easle card

As the Challenge over on Creative Craft World is an Easle card this month it gave me the perfect chance to have a go at one. I used a piece of shiney turquoise card for the base, and the background. I then took one of the beautiful pictures that the lovely OAP sent me and coloured it in with promarkers. I aged the look very slightly by using pale creams around the edge of the image.

On the image of the mirror I used a small amount of glossy accents to make it shiney & look more reflective. I then added the flowers to the corners.

On the base I used the craft robo initially on white card that I inked up with promarkers for the outer circle/pattern, and then circle of paper underneath.

I made a fimo hand mirror which I made sure a small mirror could be mounted on after baking, this was stuck down and used to prop the card up.


The card was made with my MIL in mind (she makes the most wonderful corsets and other period clothing), and was given to her on her birthday.

Thursday, 6 May 2010

The big 30!

My internet now seems to be running a little smoother - actually, seeing that it wasnt working at all it is now running a lot smoother!

For todays Papercraft Thursday I would like to share with you some beautiful cards that some of my friends have made me for my birthday ... yes the big 30 :)


From top left
Paddington, Marg, Bunbun

Maroon one in the middle:
Made by my 2 sons, a cut out of a bat :)

From bottom left:
Rainmac, Furrypig and Choccy
The quality of the cards (as well as post-it note holder and magnetic peg from Rainmac) are all of a very high standard and I an honoured to be able to have them on display ..... thanks gals :) they truely made my day xx

Thursday, 8 April 2010

Bottle Hanger

The lovely Rusty kindly shared with me the template she used to make her bottle hanger.
I used it to add to a bottle of red wine we'd got my SIL for her birthday so we could put a little bit of money with it to treat herself to something to go with it such as a chinese.

I made it to go the opposite way to Rustys so you couldnt see the money, and decorated the front with flowers and a "birthday wishes" sticker.

Linkwithin

Related Posts Plugin for WordPress, Blogger...